


How To Get The Best Results With One Step Compound
How to Get the Best Results with One-Step
 Skip to content
Germany

You’ve probably seen our big details before, right? But for those who haven’t, let us give you the full picture. Every so often, we close down the entire Auto Finesse Detailing Academy for a few days and bring in an extended team to focus on transforming a single vehicle from top to bottom. When this happens, everything else takes a backseat—the professional training, product testing, car building and modifying, you name it.
This is where detailing goes to the extreme. We even bring in mechanics to remove parts that need extra attention inside and out. To put it simply, it's a massive undertaking. It’s as thorough as detailing gets, and we can assure you—it’s as fun as it looks.
Now, we’re not talking about the type of detail you do every week. For this project, we put in over 400 man-hours. The key takeaway here is that this gives us the rare opportunity to push the limits of what’s possible without worrying about cost. We dedicate all that time and manpower to some pretty intense extras, beyond just paint correction and finishing. For this job, that meant tasks like cleaning bulbs, disassembling and cleaning the insides of tired headlights, and even polishing the OEM tool kit.
So yes, our big details are pretty hardcore—but don’t think this is something you couldn’t do yourself. With the right products and some know-how, the fundamentals of car detailing remain the same as always. The only difference is that it will take you a bit more time—or a lot more hours!
Now that you know what it’s all about, let’s dive into the behind-the-scenes of our latest transformation...
So, how did we choose the car for this big detail? Well, the short version is—we didn’t. That was all up to you.
If you’re a regular on our social media, you might remember our “Win a Big Detail” competition, which saw thousands of entries. The goal was to find a car worthy of a full transformation—one that could really benefit from a complete correction. Of course, we had some pretty hilarious full restoration entries, too. Unfortunately, we couldn’t pick those, as they needed to be complete cars… and, you know, have a bit of paintwork to polish!
In the end, we narrowed it down to 10 contenders and left the final choice up to you. Your pick? Zach’s E36 328i, in a stunning BMW Techno Violet color. We can totally see why this one topped the list.
The car itself was a bit of a barn find for Zach. He’d had it for a while, and it had been sitting while he completed an underside and running gear restoration. That was the good news. The rest of the car, though? Well, let’s just say it looked a lot better in pictures than in person. The paint was swirled, the engine bay was grimy, and the interior was far from pristine. But luckily, these were exactly the areas we could work on to take this Bavarian beauty to a whole new level of expertly detailed perfection. We arranged for a covered trailer to pick it up and eagerly awaited its arrival…
The first day, as always, is all about setting the stage for the detail. This is when we tackle the "wet work," where we cleanse and decontaminate the entire vehicle. Naturally, for a big detail like this, we take the process to the next level.
Before diving in, though, a thorough inspection is essential. We need to check for any "small" surprises that could impact getting the car back to its owner in 5 days—things like a missing exhaust, a cracked windscreen, a collection of parking dings, and other bits and pieces that may need to be ordered. While this doesn’t strictly fall under the detailing category, we can’t exactly half-ass our competitions, can we?
As for the paintwork, although it was dull, faded, and swirled, most of the exterior could be restored and enhanced with no issue. However, the boot lid was in much worse shape, suffering from deep scratches and lacquer peel. The best solution here was to send it off to our local body shop for a repaint. This is where time management really comes into play. After all, detailing can fix a lot of things, but there are some limits.
When it comes to the wash stages, the key here is being incredibly thorough. It's not just about removing contaminants to ensure safe paint correction; the goal is to eliminate every bit of grit and grime to prevent it from causing problems down the line. Extra attention must be paid to panel gaps and crevices to reduce the risk of contaminants being dislodged later and interfering with the correction or finishing processes. And, of course, it's essential to stick to swirl-free wash techniques. There's no point in allowing poor washing practices to create even more paintwork damage that will need fixing later. That’s a golden rule.
To avoid cross-contamination, we always begin with the dirtiest parts of the vehicle. While this usually means starting with the wheels or engine bay, with a large crew working on the project, we were able to tackle both at the same time—mostly without stepping on each other's toes.
While there were a few leaks, stains, and plenty of grimy bits, the engine wasn’t drenched in oil or falling apart, which is always a pleasant surprise with a modern classic. A quick application of Eradicate Engine Degreaser, worked in with detailing brushes, provided enough cleaning power to tackle the heavy soiling, making light work of this particular engine bay. After a thorough rinse to safely remove the grime trapped in the degreaser, any contaminants that could interfere with the rest of the detail were left on the floor, exactly where they should be. A quick coat of Dressle All Purpose Dressing wrapped up this stage... but of course, we’ll add some finishing touches later in the detail. We always go the extra mile.
At the same time, we tackled the wheels and tyres, which in this case involved removing them from the car. The reason is simple: taking off the rims gives us the best access to both the inner arches and the back of the wheels. These areas tend to be much more contaminated than the visible faces, even when they look clean.
Zach’s E36 M3 wheels were in good shape in terms of scuffs and, from a distance, seemed free of road grime. But as with any detailing job, a closer look revealed the truth—these wheels were severely contaminated with ingrained brake dust, clearly showing they hadn’t been treated with a strong metal remover, like Iron Out Contaminant Remover, for quite a while. The inside of the wheels also had extreme contaminants, including sticky residues from wheel weights. So, the job here wasn’t just a general clean, but more of a decontamination process. This is exactly why we like to remove the wheels whenever possible—rims are rarely as clean as they appear.
We used a combination of Iron Out to break down the ferrous metal deposits from the brake dust and Imperial Wheel Cleaner for the heavy-duty clean. These were applied using a variety of barrel and detailing brushes, working them into every nook and cranny. As you’ll see in the video, it’s crucial to cover every inch to ensure nothing gets missed, otherwise, you’ll need to go back over certain areas with more product and water. For the sticky residues, ObliTARate Tar & Glue Remover came to the rescue. It’s safe on painted and powder-coated wheels and can be applied directly or using a microfibre cloth.
This kind of deep cleaning and decontamination is something we do periodically, to remove the harshest contaminants before adding protection. It’s not part of routine maintenance. Later, we'd apply ceramic protection both inside and out using our Caramics Wheel Protection Kit. This will prevent grime and brake dust from bonding, making it much easier to keep the wheels clean over the next 12 months.
Finally, we also cleaned the tyres using Tread Tyre Cleaner and a Rubber Scrubber Tyre Brush. For this stage, we scrubbed and rinsed both the inner and outer sidewalls to remove ingrained grime—and with Tread, that’s all it takes. You can even go the extra step of cleaning out the treads, which is completely safe to do. Since we needed the wheels on to move the car into the bay, we would finish cleaning the treads later, just before applying wheel protection and Satin Tyre Dressing (on the sidewalls only) to nourish and protect the rubber.
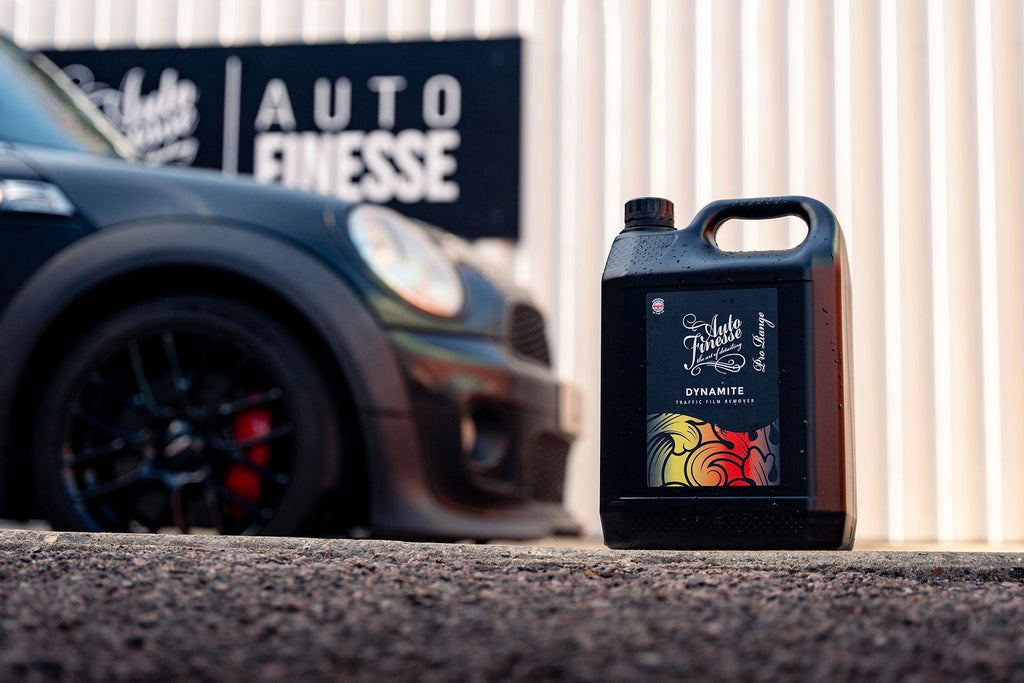
The inner arches are often more contaminated than you might expect. It's not just the mud and road grime we all anticipate, but also sticky residues, brake dust, and ingrained dirt—contaminants that can be effectively removed during a “wheels-off wash.” The key here is choosing the right cleaning agents for the level and type of contamination. Strong dilutions of cleaners like Verso All Purpose Cleaner or Dynamite Traffic Film Remover are great for tackling road grime and mud, especially when used with an Arch Blaster Wheel Brush. Ready-to-use products like Tread or Eradicate also work well.
For ferrous metal deposits around the arches and chassis components (excluding brake discs), Iron Out is your go-to solution. And while we typically don’t recommend tar and glue removers on exterior plastics, ObliTARate does an excellent job of tackling heavy tar in these areas. The most important thing is to ensure that all loose mud and dirt that could ruin the detail later is thoroughly removed. Even if you’re not removing the wheels and just performing regular maintenance, always make sure to hit the arches with a good cleaning agent and pressure washer to flush out as much as possible.
Thorough pre-washing is essential not just for preventing swirl marks and protecting waxes or ceramic coatings during routine maintenance, but also for every wash, even when polishing is planned later. This step minimizes the defects you'll need to correct and ensures that any harmful grit, grime, or dust is fully removed, preventing it from being blown out and causing damage during later stages.
The fundamentals of pre-washing remain the same, regardless of the detail. Start with a full rinse to remove any loose dirt, ensuring that all panel gaps are cleared of particles. This step ensures that the pre-wash cleaner can target the actual bonded grime, not dirt that can be easily rinsed away first. Products like Citrus Power Bug & Grime Remover, Dynamite Traffic Film Remover, and Avalanche Snow Foam are formulated to lift and encapsulate harmful particles, which can then be rinsed away.
As demonstrated in the video, we used Dynamite in a Snow Foam Lance for this process, which shows how products and methods can be adapted to specific tasks. The lance helps to dilute and whip up the citrus-infused solution, providing even coverage and extended dwell time. Meanwhile, we used a brush to tackle grubbier and harder-to-reach areas like door shuts, grilles, badges, and the fuel flap, adding a bit of Citrus Power for extra cleaning strength. Using the lance ensures that the solution reaches every panel gap, effectively cleaning those spots too.
Next comes the contact wash, which, as usual, involves a thorough two-bucket method using Lather Car Shampoo. We begin by tackling the cleanest areas of the vehicle first. The goal here is to prevent cross-contamination—essentially, avoiding the transfer of grime from dirtier sections to cleaner ones, minimizing the risk of damage. We start with the roof, windows, bonnet, and upper sides before working our way down to the front bumper, lower sides, and rear.
The essential 3-stage decontamination process is specifically designed to remove stubborn particles and contaminants that washing alone can’t eliminate. To safely decontaminate a vehicle, we use specialist products: Iron Out to chemically react with and remove sharp metal particles, ObliTARate Tar & Glue Remover to tackle tar and sticky residues, and a Clay Bar with Glide Clay Lube to physically pull out organic and inorganic contaminants, such as mineral deposits, overspray, and protein residue from the paint surface.
Removing these contaminants before starting any paint correction is crucial to fully prepare the surfaces and prevent damage. You don't want sharp, harmful particles interfering while polishing.
These three steps are safe and easy to carry out, as shown in our article on How To Safely Decontaminate Your Paintwork. The only adjustment here was using a Foam Lance to apply the Iron Out, which we then agitated with a Foam Applicator for added effectiveness. This isn't a process you'll need for every detail, but for this project, it ensured maximum product coverage.
After thoroughly drying the car with Aqua Deluxe and Silk Drying Towels, it was time to move it into the bay. Normally, the next step would involve taping up delicate areas in preparation for paint correction. However, since this was one of our big details, we weren’t cutting corners—we were prepared to go the extra mile, no matter the labor involved.
The reality is, especially with older vehicles, there are plenty of hidden dirt traps that, if left unchecked for years, can accumulate grime that’s tough to reach with standard detailing techniques. To clean these areas properly, some parts need to be removed for a deep clean. Of course, there’s always the risk of damaging or breaking parts, particularly on vintage cars where finding replacements can be difficult. In these cases, it's safer to tape off items like side trims and badges. However, parts like lights, spoilers, and grilles are usually easy to remove without needing any specialized tools—and even after a thorough wash, you’d be surprised by what’s lurking beneath.
Cleaning the grime is usually pretty straightforward. For most areas, a diluted solution of Verso, a detailing brush, and a couple of Microfibre Work Cloths are all you need to get things looking spotless.
Interiors are another area where removing a few components can make a big difference. We’re not suggesting you start pulling out your dashboard or headlining—that would be time-consuming and a bit over the top. However, taking out the front seats (when it’s safe to do so) gives you the best access to the carpets and other hard-to-reach areas inside. Plus, it allows for a more thorough and effective cleaning, front and back. Think of it like moving your sofa at home to vacuum the carpet and clean the cushions—there’s really no difference when it comes to detailing.
After all the stripping and taping, you'd think the polishing would begin right away, but there are a couple of crucial steps to complete first—paint inspection and testing. Using a detailing light and a paint depth gauge at key points around the vehicle, we determine the extent of the defects and assess how much correction is needed. This gives us insight into the type of polish, compound, and pad required for machine polishing. More importantly, it tells us if there's enough paint left to safely polish. This is where we check for areas with thin paint or blending from previous repairs that should be avoided to prevent burning through the surface or exposing hard edges. This is particularly vital on older vehicles with unknown histories.
Full paint correction involves leveling the paint's surface to the bottom of the deepest defect, effectively making the imperfection disappear. Of course, some defects are deeper than others, and attempting to level them all the way down may be too risky, especially on thin paint or clearcoat layers. This is where a detailer's judgment and experience come into play. We need to decide which defects can be fully removed and which will have to be reduced in visibility. Typically, swirl marks and light scratches are the main targets, as removing them only requires cutting away a few microns of clearcoat. Deeper scratches, particularly those that extend beyond the clearcoat into the paint layer, can't be completely eliminated through polishing. However, with the right techniques and products, such as Ultra Glaze Paint Glaze, their appearance can be significantly minimized.
The final stage of the inspection process involves compound testing. Here, we experiment with various combinations of abrasive polishes and pads, starting from the finest compound and gradually working our way up to coarser options. The goal is to stop once we find a combination that effectively removes the defects. This step ensures that we don’t unnecessarily start with a coarser compound, which would require more cutting and additional refinement stages, ultimately wasting time, product, and removing more of the paint layer than needed.
For this BMW, a medium compound and pad (like our Revitalise No.2 Polishing Compound and Revitalise No.2 Pad) were sufficient for the cutting stage, effectively eliminating most swirl marks and defects. We adjusted this combination slightly for specific areas, using coarser options on spots with deeper defects. In some cases, wet sanding followed by a three-stage process (starting with coarse compounds and moving to finer ones) was required to tackle the most stubborn imperfections.
As for the compounds and pads used on the BMW, while we did use products from our Revitalise V2 Range, some of the tools were actually prototypes for our upcoming Pro Range. If they look unfamiliar now, you’ll be seeing them soon!
Once the testing phase is done and we've determined the best combinations for the job, it’s time to tackle the entire vehicle, cutting every inch of paintwork and often any gloss plastics as well. The amount of time required for this stage depends on several factors, including the hardness of the paint (which affects how long it takes to cut), the size of the vehicle, and the shape and size of each panel. Fortunately, being at Auto Finesse, we had our top detailers on the job. By the end of the first very long day, the team had already completed the vast majority of the car. Day 1: done.
Day 2 kicked off with some paintless dent removal (remember those pesky parking dings?), thanks to the experts at The Dent Men. After that, we wrapped up the final cutting stages on the main body panels before moving on to the crucial final paint refinement.
Paint refinement, while technically part of the cutting process, involves using a much finer abrasive. This stage is all about removing any hazing, holograms, or micro swirls left over from the previous cutting stages. It’s the finishing touch in any multi-stage correction process, smoothing out the surface for a flawless, eye-catching finish. Like the cutting phase, this is a time-consuming task, with our detailers focusing on getting every inch just right for the rest of the day.
While the refining was happening in one detailing bay, the rest of the crew got started on cleaning the parts we’d removed in another.
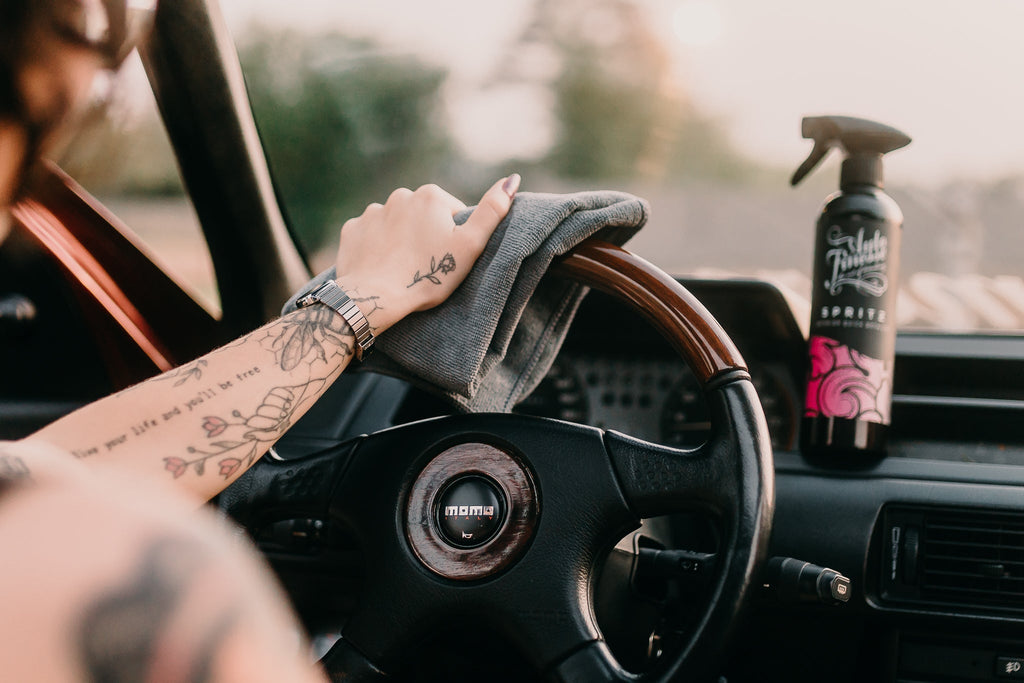
We began with the front seats, tackling them with Hide Leather Cleanser and an Upholstery Brush. After vacuuming away the obvious grime, dark leather seats and steering wheels might look clean at first glance. But once we applied the proper cleaning solution, you’d be surprised at how much dirt, dye, and body oils show up on the microfibre cloth. It’s eye-opening, to say the least. And remember, shiny leather is often a sign of dirty leather. Hide Leather Cleanser does an amazing job of removing the toughest grime while being gentle and non-damaging to the leather underneath.
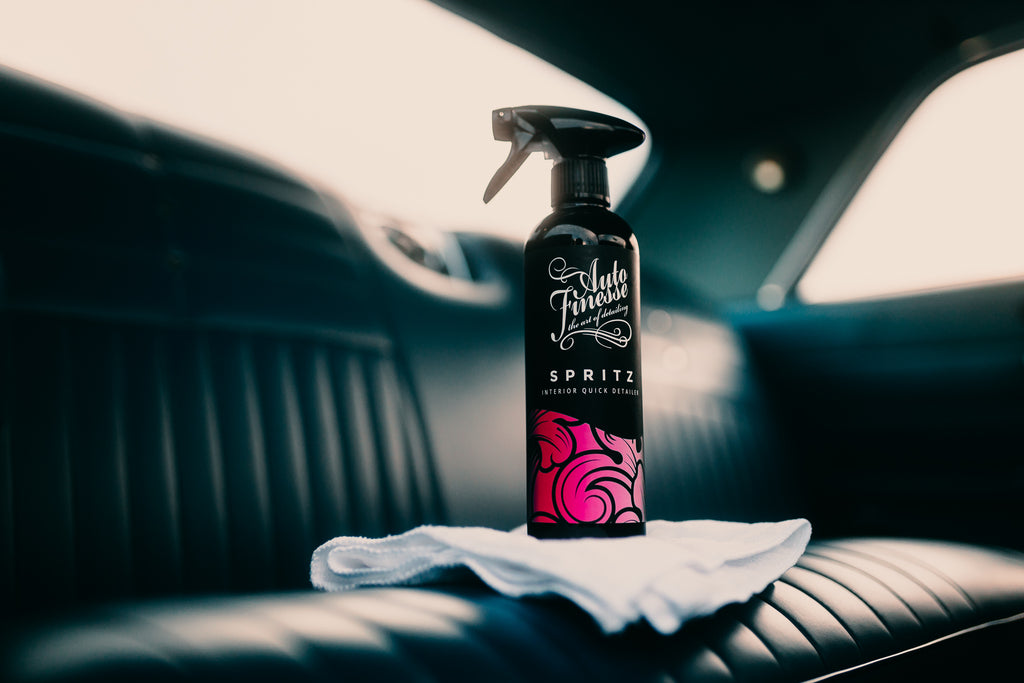
Next, we tackled the rest of the interior. Don’t underestimate the power of a good vacuum on mats and carpets—these areas often hold the bulk of the grime. Once we sucked up all the loose debris, a quick spray of Total Interior Cleaner (we also used the Rhubarb and Custard variety along the way) followed by some agitation and a wipe down was all it took. Total Interior Cleaner works deep within the fibers, breaking down and lifting ingrained dirt, making it easy to wipe away with a cloth.
Some commonly overlooked areas that trap grime and odors are the seatbelts and headlining. In the video, you’ll see us using Total Interior Cleaner along with a steam cleaner, but another effective method is simply spritzing Total on a fresh microfiber cloth and gently wiping the surfaces—or spraying directly, making sure not to saturate the material. Don’t forget to pull the seatbelts all the way out when cleaning them, as most odors tend to get trapped in the reels.
For areas like the dashboard, trim, and steering wheel, a quick spray of Total followed by a brush into hard-to-reach spots and a wipe down is usually all that’s needed to get them looking spotless.
Day 2 also marked the time to clean all the other parts of the car. The tired plastic arch liners, engine plastics, and bumper trims were all thoroughly cleaned using Verso APC before being coated in a generous layer of Revive Trim Dressing. If you’ve got the time, this is a fantastic trick—when left overnight, the silicone polymer-based gel soaks deep into the plastic, restoring and darkening its original color while enhancing durability.
Additionally, machine polishing (or hand polishing with Tripple All-in-One Polish) of the rear light lenses and side repeaters can have a big impact on the final look. These softer plastics are more prone to swirls than the paintwork, but fortunately, the defects are easier to remove. Once polished, they’ll look as fresh as the rest of the car, ensuring that no area stands out as a flaw next to your flawless paint. For us, detailing is all about balance—it's too easy to let one section down, which is why we couldn’t resist cleaning and polishing the OEM tool kit, too. It’s the little details that make all the difference.
We’ll be honest—by Day 3, we were ahead of schedule. With the paintwork fully refined, we could dive straight into the finishing steps, plus a few bonus touches.
First up, the headlights. Initially, we thought we’d just machine polish the glass with Vision Glass Polish and a Microfibre Spot Pad on one of our MPX Dual Action Polishers. However, a closer look revealed that most of the staining was inside the lenses, with the usual buildup of debris and bugs. To tackle this, we decided to split the headlights and clean them thoroughly inside and out with a mix of Verso APC and Crystal Glass Cleaner. Once cleaned, we machine polished the lenses and applied a layer of ceramic protection using our Caramics Glass Protection Kit. It’s a small job, but the difference it makes to the overall finish is huge.
While all this was going on, we also applied our ceramic protection to the exterior paintwork using our Caramics Paintwork Protection Kit. Unlike traditional coatings, we’ve designed our ceramic resin to be incredibly easy to apply with the help of Ceramic Resin Wipes. After thoroughly prepping each panel with the included Prep Spray, we simply wiped the surface with the impregnated wipes to transfer the coating onto the paint. The resin then bonds at a molecular level, and once the residue is buffed away, it provides up to 12 months of protection and exceptional hydrophobic water behavior. It’s everything you want from a coating, all in one easy-to-apply step.
Similarly, we applied our Caramics Wheel Protection Kit to provide long-lasting ceramic protection to both the inside and outside of the wheels. This kit is specifically designed for ease of use, even for those detailing at home. The coating comes in a convenient spray form, allowing you to mist it on, work it in with the included micro applicators, and then buff away any excess residue. It’s a fast, simple, and incredibly effective way to protect your wheels from the toughest contaminants on the road. Just like the paint protection, one application lasts up to 12 months.
On Day 3, we wrapped up by refitting a number of parts, including the front bumper, seats, and mats, back into the now pristine interior.
The plastic trim pieces we had prepped earlier were also reinstalled and given a final touch-up with Revive for that perfect finish. While we typically use a few spritzes of Dressle All Purpose Dressing for quick touch-ups on plastic arch liners during maintenance details, using Revive when the wheels are off is a better option. This silicone-based product provides extra durability, ensuring the plastics stay looking fresh for longer.
After applying two coats of Satin Tyre Crème to give the tyres a subtle sheen and plenty of protection against the elements, we reinstalled the freshly coated wheels. With that, Day 3 of the detail was officially complete.
The final day of the detail was dedicated to those finishing touches and perfecting the finer details. We polished engine bay components, reinstalled our ceramic-coated headlights, and applied our Caramics Glass Protection Kit to the exterior glass. True to form, we've designed this ultra-hydrophobic coating for easy application using impregnated wipes—just apply, buff, and the residue disappears. It's that simple, and that's the beauty of Caramics.
This was also the time to tackle any non-detailing tasks that could reveal flaws in the final result, starting with a new windscreen from Jay & Rob's Windscreens. Naturally, as soon as their technician had it bonded in, we applied a ceramic coating to ensure it was protected too. The team certainly worked quickly!
As we mentioned earlier, the 328i came to us without an exhaust, and obviously, we weren’t about to slap on a rusty standard replacement – that's just not our style.
Instead, we reached out to our friends at Scorpion Exhausts earlier in the week, and they generously sent over a brand-new stainless-steel system. Quite the upgrade, right? We got that installed and polished up with some Mercury Metal Polish for that perfect finishing touch.
The final task of the day was, of course, bolting on and wiring in the bootlid – but not before the detailers had one last chance for some final refinement and a touch of ceramic coating. It's totally possible to cut and refine brand new paint, even before it's fully had time to gas out, but it's important to be extra cautious with the pad and product you choose for the clearcoat. If you’re working on a fresh respray and aiming for a flawless finish, check out our specialist article, Detailing A Fresh Paint Job, for more tips.
By the end of Day 4, the big detail was essentially complete, and all that was left was to see what Zach, the owner, thought of the transformation.
Before the reveal, it’s always a good idea to take a step back and make sure everything is 100%. After a full day of work, there’s a chance you might have picked up a little dust or a few fingerprints (where do they even come from?). Having some glass cleaner and a quick detailer handy for a final wipe-down is a great way to ensure everything looks perfect.
In this case, we used Caramics Gloss Enhancer and Caramics Glass Cleaner, which not only give a final polish but are also designed to strengthen and prolong the life of ceramic coatings. These products work great on their own, but they're especially perfect for maintaining our Caramics range.
With that quick maintenance wrapped up, we were ready for the reveal – and we think the results speak for themselves. As you can imagine, and as you can see in the full video, Zach was absolutely thrilled with the transformation. To top it off, we even filled the boot with a bunch of detailing products to keep him going in the months ahead.
And that’s a wrap on our latest Big Detail Competition! Be sure to stay tuned to our social media channels for more updates – who knows, next time it could be your turn!
