Detailing and Protecting a Brand-New Car

In This Guide:
- Discover the simplest and most effective method to detail a brand-new car.
- Learn about the essential products for cleaning and ceramic coating your vehicle.
- Explore the advantages of applying a ceramic coating to your car at home.

The Advantages Of Applying Caramics To Your New Car:
- Quickly and easily safeguard your investment for up to 12 months.
- Protect every part of your car, not just the paintwork.
- Save hundreds, or even thousands, with Caramics compared to dealer-applied coatings!
Because enhancing and safeguarding your new purchase is always a smart decision...
You might think a brand-new car fresh from the factory doesn’t need any detailing, but the truth couldn’t be more different. Sure, your new car won’t arrive in a filthy state—dealers will typically give it a wash before delivery. However, that wash isn’t always the safest or most swirl-free process. After all, car dealerships focus on selling cars, not perfecting the detailing process. A quick splash and dash is often the extent of their efforts.
If you opt for additional services, such as a ceramic coating, it might come with a hefty price tag. Worse still, the paintwork they’re protecting might not have been adequately prepped or corrected beforehand, leaving less-than-perfect results.
But there’s a better way. You can achieve a flawless finish, save yourself hundreds—if not thousands—of pounds, and put that money toward other essential extras. Here’s our guide on how to properly refine, protect, and elevate your new car beyond factory fresh, all with the right tools and techniques.

Why Should You Protect a New Car?
Simply put, protecting your car is essential to shield it from environmental factors and preserve any detailing work you've invested in. For new cars, unless you've specifically paid for a professional detail, it's unlikely that the paint will come with any form of protection. Even more so, the wheels, glass, and interior are typically left unprotected, making them vulnerable to dirt, contaminants, and wear over time.
Modern paint finishes tend to look great straight from the factory, making new cars ideal candidates for ceramic coatings. These coatings provide a tough layer that repels water and grime, helping to prevent micro-scratches and oxidation from forming. It's all about safeguarding your investment.
However, adding protection starts with proper preparation. Even factory paint, especially on high-end vehicles, isn't always flawless. While new cars don't have the dents and dings seen on older ones, the paint often isn't quite ready to accept protective coatings right away. A closer look will reveal that, in many cases, it requires some attention first.


What Makes Coating a New Car Different?
The short answer is that coating a new car with Caramics is essentially the same process as applying it to any other vehicle. As long as the surface has been properly prepared, the application process remains unchanged. Caramics ceramic coating works on cars of any age, including those with vinyl wraps.
The main difference lies in the washing and preparation stages. For a new car, there’s usually less need for extensive decontamination and paint correction. Of course, some minor preparation is still required, as the car may have picked up grime during delivery or a test drive. And we totally get it if you’ve already taken your new ride for a spin down some muddy country roads—just remember, any dirt and contaminants must be thoroughly cleaned off before proceeding with paint refinement and applying the coating.

It’s important to consider where the car has been stored after manufacturing—perhaps in a dusty warehouse or storage yard. Along with the wash the dealer may have done during their time with the car, there are other factors to keep in mind. New cars are often wrapped in protective shrink wrap and polystyrene armor during delivery, which can sometimes cause abrasion to the paintwork. Additionally, tape may have been used in various areas, leaving behind sticky residues. It’s possible that the dealer used harsh chemicals to remove these or scrubbed the surfaces, potentially causing swirl marks.
While these issues might not be as severe as those on a car that's been driven for years, it’s clear that new cars often aren’t flawless. Simply applying a coating to lock in these imperfections is not the best approach. The good news is that the entire process of cleaning, preparing, and applying protection with our Caramics Complete Protection Kit is simple and effective. Just remember three key steps: clean, enhance, and protect.

Step 1 - The Wash Stage
An effective pre-wash is essential to ensure your car is free from loose dust, grime, and debris before the contact wash. But before you begin, it's crucial to tackle your wheels first, especially since with Caramics, you can apply a ceramic coating to them as well.
Unless you've driven your car extensively, the grime and brake dust on the wheels will likely be sitting on the surface, meaning you don’t need a full decontamination wash. Simply use Imperial Wheel Cleaner, paired with brushes dipped in Revolution Wheel Shampoo, to lift these contaminants away.
When cleaning your wheels—especially if you're planning to coat them—make sure you clean every surface thoroughly. Use a Barrel Brush for the inner rims and spokes, along with a Detailing Brush and wash mitt for the rest. Be meticulous, and don’t forget to scrub your tyres and arches as well. We recommend using Verso All Purpose Cleaner for these areas.


Next up is one of the most crucial steps—the 2-stage pre-wash. As mentioned earlier, even if you haven’t driven your car much, you won’t know where it’s been stored, so the pre-wash is essential not only for removing the obvious dirt but also for flushing away any abrasive dust and grime that could have settled into recesses and panel gaps. By doing this now, you eliminate the risk of transferring these particles to the paintwork during the coating process.
Start with a full rinse to remove any loose debris, then move on to the first stage: using a pre-wash cleaner. We recommend Citrus Power Bug and Grime Remover, which is tough enough to break down and lift the stubborn contaminants. No dilution is needed—Citrus Power is ready to go straight out of the bottle.
Spray it generously onto all surfaces and allow it to dwell for a couple of minutes, giving it time to break down the dirt. After that, simply rinse everything off with your pressure washer, and the toughest grime will be gone.


The second stage of the pre-wash involves using Avalanche Snow Foam. Packed with citrus-based cleaning and degreasing agents, Avalanche works to break down grime in a similar way to the pre-wash cleaner. However, this foam has the added benefit of working its way into all the hard-to-reach gaps and crevices, lifting and lubricating dust and contaminants that might otherwise be difficult to remove.

Once you've applied the Avalanche Snow Foam from top to bottom, it's a good idea to use a detailing brush to agitate areas like the front grilles, window rubbers, and fuel caps. This helps lift any trapped grime. Afterward, make sure to thoroughly rinse the vehicle, paying extra attention to areas like the arches, grilles, and panel gaps to ensure all contaminants are fully flushed out.


Now you're ready for the contact wash. Simply add 3-4 capfuls of Lather Car Shampoo to your wash bucket to tackle the remaining grime. As always, using the two-bucket method is essential—rinse your wash mitt in a plain water bucket before dipping it back into the shampoo bucket to keep your wash free from swirls.
Once you've cleaned every part of the vehicle, give it another thorough rinse to remove any dirt. Afterward, take a moment to check for any remaining contaminants.


For a brand-new car, a full 3-stage decontamination isn't usually necessary. Sticky residues like tar and glue are unlikely to be present unless the car has significant mileage, and paintwork won't typically have ingrained contaminants or oxidation yet—it’s simply too new. The key is to assess what your car really needs.
One important process to consider, however, is using Iron Out Fallout Remover to eliminate any ferrous metal particles that may have settled on your paint during storage or transport. These tiny, sharp metal particles can quickly embed themselves in the paint, even on a car with minimal mileage.
Applying Iron Out is straightforward—just spray it onto the surface, allow it to sit for a few seconds to break down the fallout, and rinse away the metal particles suspended in the solution. This step helps prevent these particles from causing scratches or swirls when you move on to refining the paint.

The final step in the wash process is to re-wash the areas treated with Iron Out using your Lather Car Shampoo. This will effectively neutralize any remaining product residue, leaving the surface pH-neutral and clean.
Once you've rinsed thoroughly, use an Aqua Deluxe Drying Towel to dry the entire vehicle. Only once your car is completely dry can you move on to the next stage.


Step 2 - Paint Correction & Enhancement
On a new car, it's unlikely you'll need heavy correction with coarse abrasives, as significant paint damage is rare. The primary goal here is to refine the paintwork, removing light swirls and achieving a finish that's better than factory standards—what we like to call "detailer standards."
However, a thorough inspection of the entire vehicle using a light source is essential to ensure accuracy. If you spot any deeper swirl marks or scratches, you'll need to adjust your product selection. Not to worry, our full Revitalise System will guide you through the entire process.
What's crucial at this stage is using one or a combination of our Revitalise compounds. These formulas contain no waxes or fillers, ensuring the ceramic coating can bond properly to the paintwork. In most cases, like this one, you'll want to use Revitalise No:3 Refining Compound to refine the paint.
Before starting, make sure to mask any sensitive areas, such as window rubbers and plastic trim, to avoid contact with your polishing pad.


Next, apply 3-4 pea-sized drops of the compound onto a soft Revitalise No:3 Refining Pad and gently work it into the paintwork.

Begin with your Machine Polisher on speed setting 2, using overlapping crosshatch motions over a 2-foot by 2-foot area. Gradually increase the speed to setting 4, applying moderate pressure, then finish with a final pass on speed setting 2. You'll know the Revitalise No:3 is fully worked in when the hazing under the pad disappears and the surface becomes clear.


Wipe away the residue from the entire section to reveal your newly refined paint. Once you're satisfied with the finish, clean your pad (using a Pad Cleaning Brush away from the vehicle) to prevent product buildup, then move on to the next section.
After you've completed the whole body, it's time to grab the Caramics Complete Protection Kit and start the ceramic coating process.

Step 3 - Caramics
Caramics is specifically designed to simplify the application of ceramic protection. Each part of the kit (paintwork, glass, wheels, and interior) follows a multi-stage process crafted to prepare and coat surfaces, leaving behind a durable Si02 layer that provides hard, quartz-based protection for up to 12 months.
The Paintwork Protection Kit is your starting point. This kit includes Ceramic Resin Wipes, which make applying and spreading the Caramics coating effortless. However, before applying the coating, ensure the surface is prepared by using the included Prep Spray.
Lightly mist the Prep Spray over the paintwork and buff off with a fresh microfiber cloth. This will remove any polishing oils, residues from previous stages, fingerprints, and any dust that may have settled on the car.


Now, take your Ceramic Resin Wipe and unfold it fully, then fold it into quarters. This makes it easier to hold and gives you more control during the application. One Ceramic Resin Wipe will be sufficient to cover an entire panel.
Begin in the center of the panel and work your way out in overlapping lines, first moving from top to bottom, then from left to right. Be sure to maintain even coverage throughout the process.


After allowing 2-5 minutes for curing, begin buffing off the residue, starting from the outer edges and working your way inward to ensure a streak-free finish.
Use a light source to double-check that all residue has been removed, then proceed to the next panel. That's all there is to it!

Our Glass Protection Kit follows a similar application process, using specially designed Glass Wipes.
Start by using the included Glass Polish to thoroughly clean the glass, removing any contaminants. This step is crucial, even on a new car, to ensure the surface is properly prepped.


Next, apply the Glass Wipe to the window using the same method as you did on the paintwork—begin by working over the entire surface in a crosshatch motion, first vertically and then horizontally. One wipe should be enough to cover an entire window, although it can be helpful to apply it in sections, especially on larger surfaces like the windshield or rear window.

Once the coating has hazed and dried, spray a couple of misted layers of the Residue Remover and use a clean microfiber cloth to buff away any excess residue, leaving your glass clear and free of smears.


Coating your wheels follows a slightly different process, as we've created our Wheel Protection Kit to be a simple spray-on product.
Begin with one wheel at a time. Start by applying Prep Spray to prepare the surface. You can either spray directly onto the wheel or onto a microfiber cloth. Wipe the area to ensure it's dry and fully covered.

Next, apply the coating by spraying it generously over the surface. Use the supplied Micro Wipe Applicator to work it into all the recesses and contours.
Afterward, wipe away the residue with a clean microfiber towel. For best results, use a light source to help ensure all residue is fully removed.


Finally, we have the Interior Protection Kit, which includes coatings for both leather and fabric. As with the other coatings, the surfaces must be thoroughly cleaned before application. After vacuuming and using Total Interior Cleaner to clean carpets, mats, and seats, you can begin using the Caramics Interior Protection Kit. Ensure that all fabrics are completely dry before applying the coating.
The interior protection coatings are applied in spray form. For fabrics, carpets, and mats, simply spray a fine mist over the entire surface and let it dry.
For leather, spray the coating onto the microfiber applicator and evenly apply a thin layer across the surface, allowing it to dry and bond with the leather.


Finishing Up
There are, of course, a few additional tips and tricks that can take detailing your brand-new car to the next level, providing even more protection along the way.
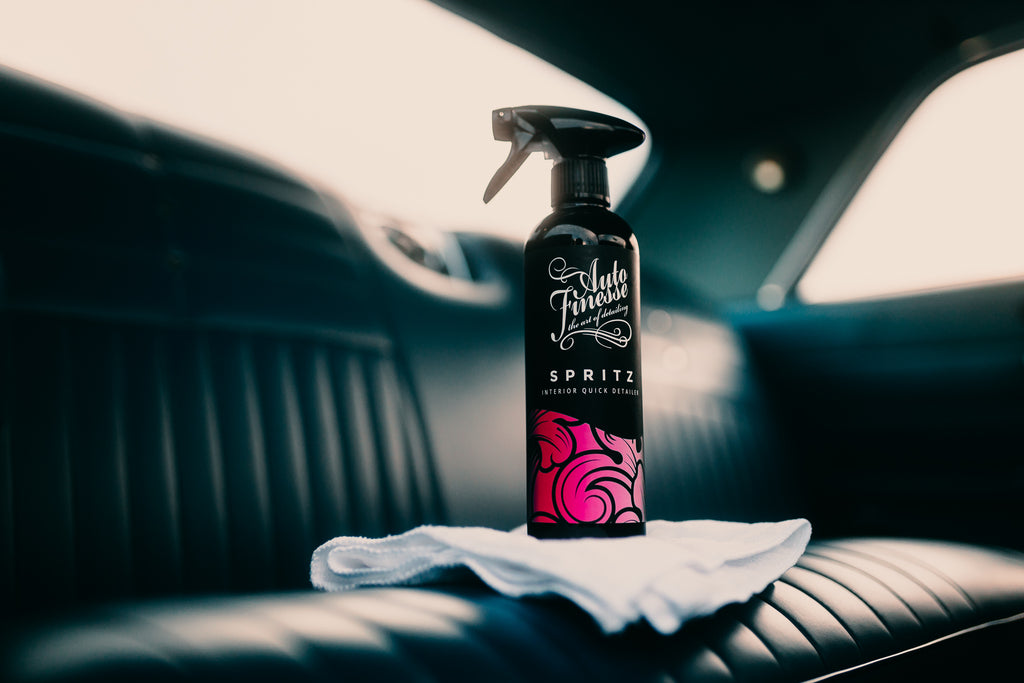
For instance, spraying Spritz Interior Quick Detailer onto a microfibre cloth is perfect for dusting and cleaning dashboards. This product also provides excellent protection against UV fading, keeping your interior looking fresh.
Similarly, Satin Tyre Dressing not only offers UV protection for your new tyres but also lets you control the level of shine you want. A single layer will give the tyres a natural matte finish, while applying multiple layers will create a glossy, wet-look shine.


And what about the often-overlooked area, especially on newer cars? We're talking about under the bonnet. While your engine may appear relatively clean and tidy, modern cars typically feature plenty of plastic components that can be easily cleaned and dusted. All you need is a bottle of Finale Quick Detailer and a microfiber cloth. A quick spritz and wipe, along with a touch of Dressle All Purpose Dressing, can really make a difference here, providing that perfect finishing touch.


Results
So, that's how you can achieve a finish that’s better than the typical "showroom look," and even more importantly, keep it looking that way for longer. As an added bonus, once you've used Caramics, your car will be much easier to clean the next time around too.


