Safely Decontaminating Paintwork

IN THIS FREE GUIDE:
- Learn about the one of the most important car detailing practices to make before polishing and adding protection layers.
- Discover the essential decontamination products and see how they work.
- Follow our simple step-by-step guide to a professional 3-stage paintwork decontamination.
Safe Paintwork Decontamination Is One Of The Most Important Steps In Car Detailing...
Paintwork decontamination may not be necessary every time you wash your car, but it's still an important stage process for any full detail. The reason is that carrying out a thorough "decon wash' reaches deeper into your paint layers than your regular car wash can. This process is all abut removing the sort of ingrained impurities and contaminants that washing alone can't. And it sets you on the right path for any further paint correction or enhancement, and the application of protection layers.
We always recommend decontaminating your paint at least twice a year: once before the winter, to get it ready for the protection layers needed to get your car through. And once after winter to eradicate the harshest, and most harmful, contamination prior to getting your car looking its best for the spring and summer. You can decontaminate your paint more often of course, and you should before any hand polishing or machine polishing processes. A decon wash removes sharp particles, environmental fallout and sticky residues - all the types of contamination you don't want swirling around on your polishing pads, inflicting defects and damaging paintwork.
But the real question is what does a professional 3-stage decontamination involve? And the answer is a group of specialist cleansing processes designed to safely deep-clean your paintwork on a molecular level. We use a number of specialist detailing products for specific parts of the process along the way. These pro-grade decontamination products have been developed to to be safe to use on paint and clearcoat layers as they remove the embedded and bonded contamination.
So, let's take a look at a few simple steps to show you how it's done, the best detailing products to use, and how to get the professional results on any type of gloss paintwork…


Paintwork decontamination, or the ‘decon wash’ stage is simply removing the kind of embedded contaminants that cannot be eradicated with washing alone. This important car care pro...
Stage 1: Before Your Decon Wash
Before you can decontaminate paintwork you have to wash your car. The decon process is removes the kinds of harmful, corrosive contamination that a regular car wash can't, so you need to wash first to remove the kind of contamination that washing can.
As all detailers know, getting the pre-wash, snow foam and contact wash stages right is the only way to ensure a swirl-free paint finish in the long term. Doing this correctly reduces the risk of dragging particles around surfaces and inflicting damage such as scratches and swirl marks. So, carrying out a detailers safe wash, after you've cleaned your alloy wheels is essential.
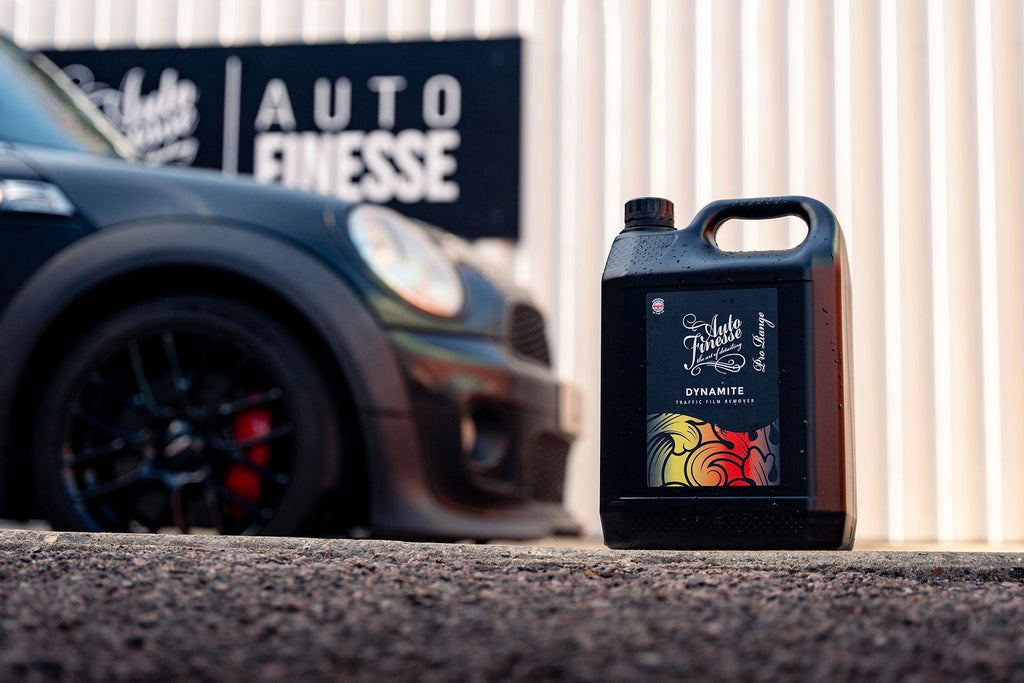
So, before you even get to the decontamination stage, you'll need to prepare in the safest possible way. Start by pre-washing with a suitable chemical cleaner, such as a suitable dilution of Dynamite Traffic Film Remover or our ready-to-use Citrus Power Bug and Grime Remover. This pre-cleaning process will break down and safely lift the heaviest particles, allowing them to be safely rinsed away.
Next we can tackle any bonded small particle contamination by using Avalanche Snow Foam. This heavy-hitting, citrus-infused pre-cleaner lingers on surfaces for longer to break down the stuck-on grime - just apply and rinse.
After the pre-washing stages, it's onto the contact wash where we remove any leftover grime. The best way is using two Detailing Buckets (one for your car shampoo, one for rinsing out your wash media). We'll also utilise a powerful car shampoo - like Lather Car Shampoo - and a professional wash mitt.
When we wash we start with the roof and follow with the windows and bonnet, the uppers sides and front bumper, followed by the lower sides half and finish on the rear. Regardless of whether your car wash is for routine maintenance or prior to a larger detail it's designed to clean away the contamination as safely as possible. For a full guide on safe car washing, see our article: How To Wash Your Car Safely.
The only difference with a decon wash is that you don't dry your car first, just see it as an extension of the wash process...


We’ve always said it; the wash stage (or the ‘wet work’) is likely the most important part of detailing process. This is because it not only lays the foundation for every stage th...
Stage 2: Fallout Removal
The first part of any decon wash is removing sharp metal particles which have lodged themselves in the top layer. You may not be able to see these tiny pieces of metal shrapnel on darker cars but they will be there. If these are left to build up on the paint surface they can corrode into the paint where they'll appear as tiny rust spots.
This type of contamination comes from a few sources, buts most commonly the of brake produced by your own car and others. This is often around in the air and can also be hot. These sharp particles made up of ferrous (iron) material penetrate so far into the surface of your paint, that they simply can't be removed with a traditional contact wash. Chemical removal - and by that we mean dissolving into a solute that can be rinsed away is the only way to safely remove them. This why we use an advanced product specially formulated for ferrous material removal - Iron Out Contaminant Remover.
In most cases you'll find ferrous contamination all over, including the roof. Iron Out can be applied directly to paintwork, where you'll see the chemical reaction take place. As ferrous deposits are dissolved into the solution, they are temporarily highlighted by turning blood red. This is referred to as "bleeding'. Once the occurs it tells us the deposits are dissolved in the solution and can be rinsed away.
A single spray and rinse application is usually enough to rid the surface of iron particles, but for even more bite Iron Out can be gently lightly agitated with a damp microfibre cloth or pad. After rinsing, your paintwork should be free of metal contamination. You can double check by reapplying a small amount of Iron Out. The bleeding will stop when there's no more metal present.
Iron Out is also ideal for periodic decontamination of alloy wheels. Obviously brake dust build up can pose a particular problem on all types of wheels. See more in our article: How To Clean Alloy Wheels More Effectively.


Developed as a heavy-hitting ferrous fallout remover, Iron Out is an advanced decontamination remover in a reactive gel, capable of safely and effectively erad... See product details More
Stage 3: Tar And Glue Removal
The sticky contamination caused by tar, adhesive residues, tree sap, rubber and fuel staining can all cause unsightly blemishes. These sticky oil-based residues also need to be removed from paintwork to cut down on the risk of scratching and marring when you move on to using Detailing Clay, or of course, later when you polish your paintwork.
The only way to remove these types of contamination safely is with a powerful solvent-based solution like ObliTARate Tar & Glue Remover. This product is designed to quickly dissolve them into a liquid solute which allows them to be wiped away with a clean Microfibre Work Cloth.
ObliTARate is used in a targeted manner, rather than over the whole car. Working on small sections, we spray on a light spritz of solvent and, just as soon as we see the contamination start to bleed, we lightly wipe away the residue. ObliTARate melts away even harshest staining, along with sticky wax factory coatings, overspray and traffic cone rash. So, after using this powerful solution, it's important to rewash any treated areas with Lather Car Shampoo to neutralise any solvent that's left behind. This will stop it melting your Clay Bar during the next stage of decontamination.


Auto Finesse® ObliTARate tar and glue remover, is a solvent-based formula that quickly dissolves stubborn tar and glue residues and contamination on contact ev... See product details More
Stage 4: Using Detailing Clay
Using clay is the final step in cleansing your paintwork of bonded contaminants. Here we can remove the deeply ingrained impurities that, most of the time at least, we can't even see. These will nclude mineral deposits from water, tree sap and protein deposits from bugs and bird droppings, industrial fallout and paint overspray.
These types of contamination tends to build up over time. This makes claying an essential step in keeping your paintwork looking its best. You can actually feel the difference in the smoothness of the surface before and after using clay. Try it yourself!
The key to a glass-like finish is to use our Clay Bar with Glide Clay Lube together to protect the surface as you work. Detailing clay is sticky on a microscopic level, which helps it physically pull out contamination, so your lube will ensure it glides freely across the surface.
The claying process is very straightforward. First we tear off around a quarter of ourClay Bar and kneed it in into a flat pad. Then, on one panel at a time, we spraying the lube on the panel and the clay, and then work the pad back and forth in straight lines with medium to light pressure.
You'll feel the resistance of the contaminants at first, but as they're lifted away from the paint, the surface will become smoother and the clay will glide more freely. When it takes hardly any effort, the panel will be free of impurities, and we can wipe it over with a clean microfibre and move on to the next. The key thing to remember is to check your clay after every few passes. Once it gets dirty, fold it to reveal a fresh piece. And, when you've completed every panel, to wash the car down one last time and dry using a suitable Drying Towel.
After this your 3-stage decon wash is complete… although there's a couple of other steps before you're done with your wider detail.


Stage 5: Next Steps
Now you can move onto the rest of your big detail, but a few words of caution. By now you will have removed any protection layers. We also recommend polishing after any decon. Whether this is by hand with our Tripple All-in-One Polish, with a machine polisher and our Pro Series Compounds, or somwhere in between, now is the time to remove any defects, enhance that shine and make your paintwork look it's best. In other words, time to take your detail to the next level!
Adding suitable paintwork protection is crucial here, too. Using a car wax, paint sealant or ceramic coating will not only add even more depth and gloss, but lock in your work and make your car easier to clean next time around.


Polishing and paint correction is often seen as the stage where your car wash becomes a fully-fledged detail. But, whether you’re restoring and refining your paintwork with a machi...


Car Wax, Ceramic coatings, and spray wax. Adding protection, especially after any polishing and correction has taken place, is not only one of the key fundamentals of car detailin...
The Results
And that's the best way to safely decontaminate your paintwork the professional way. Why not adapt this guide to your next detail and see show you can get professional-level results at home.
For more top how-tos check out the Guides Section Of Our Blog.


