


How To Get The Best Results With One Step Compound
How to Get the Best Results with One-Step
 Skip to content
Germany

The ideal time to prepare your car for winter isn’t when the snow starts falling—it’s right now. While opinions vary on the best approaches and questions abound about which detailing products and techniques work best, the key to keeping your vehicle looking its best—and fully protected—throughout the harsh season is surprisingly straightforward. Just follow our step-by-step survival guide to get your pride and joy spotless and protected now, and learn how to maintain that pristine finish well into spring.
Winter brings its own set of challenges for vehicle care, and the key to keeping it at bay comes down to three essential steps: preparation, protection, and maintenance. Each is equally important and must be executed effectively to tackle the unique demands of winter detailing, which differ significantly from the easier upkeep of the warmer months.
Preparation
The harshness of winter contaminants boils down to their increased concentration and abrasiveness, driven by road salt, grime, and other debris. These elements create a higher risk of damage during cleaning, especially to sensitive areas like paintwork, wheels, and gloss plastics, which may not yet have sufficient protection. The colder months also bring weather changes that ensure these contaminants transfer more readily from the road to your vehicle, making it a near certainty. On top of that, with daylight hours in short supply, maintaining clear visibility becomes a practical safety concern—it’s hard to argue against better all-around vision when the sun sets before dinner.
Properly cleaning and preparing your vehicle for winter is the foundation for safeguarding it against these risks. Removing existing contaminants before adding protection is the first step toward keeping your car safe and looking its best.
Protection
Once your vehicle is clean, applying protection is essential to shield its finish and prevent contaminants from causing damage during daily use. Protective layers—whether in the form of waxes, sealants, or coatings—work by creating a barrier between surfaces and harmful grime. This not only stops contaminants from sticking and becoming ingrained but also simplifies ongoing maintenance while minimizing the risk of damage.
The goal is to ensure your vehicle stays cleaner for longer while maintaining a durable defense against the elements. A properly protected car is easier and safer to clean, making winter maintenance less of a chore.
Maintenance
The final step is maintenance, where the appearance of your vehicle is determined by how often you clean it. While some may choose to wash their cars less frequently in winter, the key is ensuring that each wash is done safely to preserve protective layers. Using the right products is critical to avoid degrading your protection and to remove potentially harmful grime without causing further damage.
Once contaminants are removed, it’s all about topping up your protection to extend durability. Winter conditions demand vigilance, and it’s always better to have too much defense against the elements than too little. With every clean, your car can look great again—and stay that way.
Your Complete Winter Care Guide
Fortunately, we’ve got you covered with everything you need to know. From preparation to protection and maintenance, here’s your ultimate guide to keeping your vehicle in top condition through the coming months.
If it’s cold outside, the best time to wash your car is during the warmest part of the day. While it’s important to avoid washing in direct sunlight or during hot weather, it’s equally crucial to minimize the risk of water freezing on the ground or your vehicle as you work—for both safety and practicality. This is why washing your car early in the morning, when frost is still present, isn’t advisable. Using warm water in your wash bucket can also make the process more manageable.
When it comes to your detailing kit, safely removing heavy winter grime is the main priority. While most of your products and techniques will remain the same, extremely heavy soiling may require slightly stronger products or adjusted dilutions to achieve the best results.
While the process and products used to detail your engine bay and the underside of your bonnet are the same year-round, it’s particularly important to focus on this area during winter when road contaminants are at their worst.
Harsh grime and salt can wreak havoc on engine components, accelerating rubber degradation, causing premature metal oxidation, and staining or fading plastics. In some cases, this can even lead to component failure. For daily drivers especially, thoroughly cleaning and protecting your engine bay is essential to safeguard it from grime and damage.
For most vehicles, it’s perfectly safe to clean the engine bay using a pressure washer, as electrical systems and other vital components are typically protected by plastic covers. However, always check for exposed electrics or air filters, and avoid spraying directly onto sensitive parts like alternators.
Our recommended product for this task is **Eradicate Engine Degreaser, designed to quickly break down heavy grime, oil, and grease while being safe for use on plastics, metal, and rubber. Apply a liberal amount with a Detailing Brush to agitate and lift contaminants, then rinse away effortlessly with a pressure washer.
Once the bay is clean, there’s no need to dry it. Simply spray Dressle All-Purpose Dressing liberally over the area and close the bonnet. This water-based dressing cures to a dry-touch finish in a few hours, creating a protective barrier that makes future cleaning much easier. You can mop up any excess at the end of your detailing session if desired. For winter, apply a generous amount—this should provide protection through to spring, with only minor top-ups if necessary.
The main difference between preparing your car for winter and detailing in summer is the extra effort needed to access hard-to-reach areas.
As with any exterior detail, start with the wheels. For thorough preparation, removing the wheels one by one is recommended to clean the rear of the spokes and the vehicle's inner arches. This extra effort is worthwhile, as even standard wheels are vulnerable to corrosion from road salt, grime, and brake dust. Wheels are exposed to the harshest contaminants, and if left untreated, these can degrade protective coatings and eventually damage the metal itself, potentially compromising the wheel's structure—a significant safety risk.
To prevent this, it’s crucial to clean, decontaminate, and protect the entire wheel, including the unseen areas. Begin by rinsing your wheels with a pressure washer—whether they’re on or off the vehicle—to remove loose dirt and allow cleaning products to focus on embedded contaminants.
When cleaning the wheels off the car, start with the inside, often the dirtiest area. This helps avoid transferring heavy grime onto the wheel faces. Depending on your wheel finish, choose the appropriate product. For aftermarket anodized or polished wheels, gentler solutions like Revolution Wheel Soap or Citrus Power Bug & Grime Remover are ideal. These types of wheels are typically less contaminated and don’t require harsher decontaminants.
For painted or powder-coated wheels, Iron Out Contaminant Remover is highly effective. It dissolves ferrous particles such as brake dust, reacting visibly by turning red as it works. After application, agitate the product with a Barrel Brush, Detailing Brushes, or a dedicated wash mitt to ensure all contaminants are lifted, especially in hard-to-reach areas.
After rinsing, inspect the wheels for remaining grime. If needed, combine Imperial Wheel Cleaner with Revolution Wheel Soap to tackle any stubborn residues.
Don’t overlook the tyres, which are exposed to just as much road grime and salt as the wheels. These elements can prematurely age rubber, causing browning, fading, or even splitting. Clean them thoroughly with Tread Tyre Cleaner and a Rubber Scrubber Tyre Brush, focusing on areas often missed during routine washes, like the inner sidewalls.
Before moving on to protection, ensure the wheels are free of all contaminants. For sticky tar or adhesive residues, use ObliTARate Tar & Glue Remover or ObliTARate Gel. If necessary, clay the wheels to eliminate embedded particles. Properly preparing the wheels ensures that protection will bond effectively and last throughout the harsh winter conditions.
Having your wheels off is the perfect opportunity to thoroughly clean your arches for a deep clean. Beyond aesthetics, this process is crucial as heavy grime can take a toll on trim and mechanical components, making it essential to clean and protect them effectively.
Verso is the ideal product for the job. This versatile, dilute-to-suit APC can be adjusted to tackle even the toughest grime, safely breaking it down and lifting it away. For heavily soiled areas, a dilution ratio of 1:5 to 1:2 is usually sufficient.
Start by giving the entire area a thorough rinse with a pressure washer, ensuring all loose mud and grit are removed.
Next, tackle large multi-pot calipers and suspension components using the Verso solution and a Detailing Brush. For plastic inner arches, a good scrubbing with the Arch Blaster Arch Brush will make a big difference. Generously apply the Verso solution, agitate it with your brushes, and then rinse away the loosened grime to leave your arches clean and ready for protection.
Further decontamination may be needed for plastic inner arches, especially when dealing with sticky tar residues. It’s often surprising how much tar accumulates over time, and these residues can prevent protection from bonding effectively. Thankfully, ObliTARate is the perfect solution. Although this solvent-based product is not typically recommended for matte trim, this is an exception where it works exceptionally well. Simply spray it on, allow it to dwell, rinse away any excess, and wipe off the contaminants with an old microfiber cloth.
When it comes to adding protection, layering up is key to combat winter grime. We recommend using Revive Trim Dressing and Dressle All-Purpose Dressing together for maximum durability. This protection stage can be completed now or during the final stages of detailing your wheels, depending on your preference.
Start with Revive, a silicone-polymer-based dressing designed to rejuvenate faded plastic trim. Here, its water-resistant properties create a durable barrier against the elements. Application is simple: use a Foam Applicator to spread a small amount evenly over the area, let it cure for about five minutes, and wipe away any excess.
Once Revive has fully cured, follow up with a spritz of Dressle Apply it liberally over the arches, suspension arms, and other components for an added layer of protection. Together, these two products provide a robust shield, keeping winter grime at bay.
The purpose of an effective pre-wash is to remove the heaviest contaminants without physically touching the vehicle, reducing the risk of scratches and swirl marks caused by sharp particles. Given the harsher contaminants that winter brings, using a suitable pre-wash cleaner is essential for safe and effective cleaning.
Start by rinsing the entire vehicle from top to bottom to remove loose dirt and grime. Pay extra attention to panel gaps and awkward areas to flush out hidden debris that could later transfer onto the paintwork. This initial rinse not only helps remove the worst of the dirt but also ensures your cleaning solutions can work effectively on stubborn contaminants.
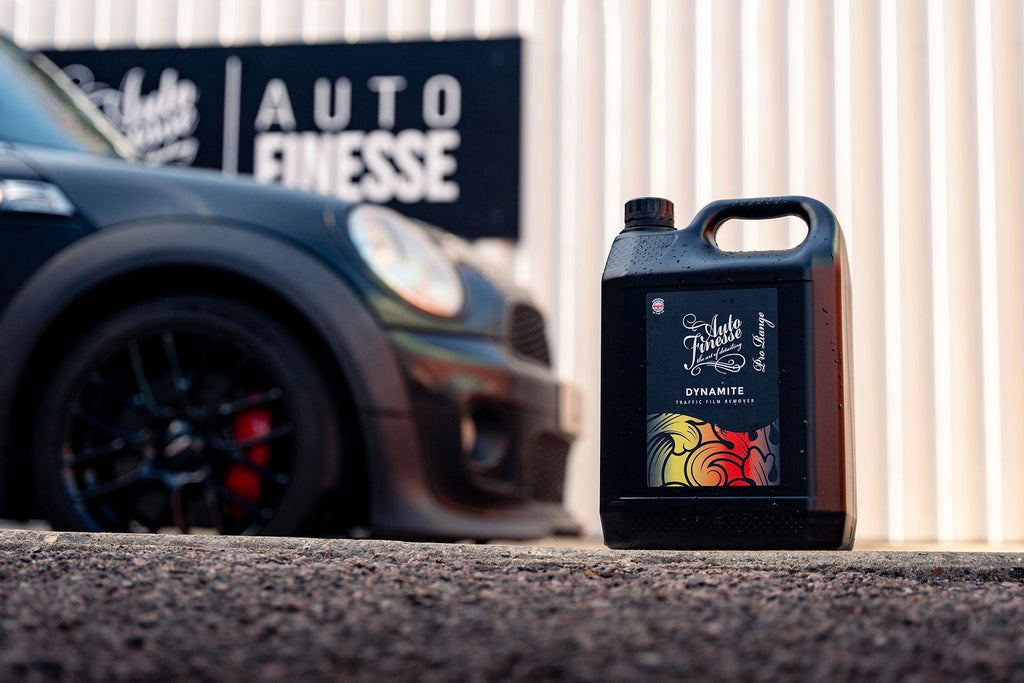
Next, apply your chosen pre-wash cleaner. Both Citrus Power Bug & Grime Remover and Dynamite Traffic Film Remover are excellent choices. The primary difference is that Dynamite is a dilutable concentrate, allowing you to create a stronger solution for heavily soiled vehicles, making it especially useful for daily drivers during winter. For tougher grime, a 1:5 to 1:3 dilution of Dynamite works well.
Apply the pre-wash cleaner across the entire vehicle, focusing on the dirtiest areas such as the lower panels and rear. Let the solution dwell briefly, allowing it to break down grime, lift it away from surfaces, and safely suspend it in the solution. Then, rinse thoroughly to remove the contamination.
To ensure a thorough clean, focus on the more intricate and hard-to-reach areas. Spray Citrus Power into panel gaps, door jambs, and boot shuts. Use a Detailing Brush to agitate these areas before rinsing with a pressure washer. This extra attention ensures every part of your vehicle is properly prepped for the next detailing steps.
The second stage of an effective pre-wash involves using Avalanche Snow Foam** to tackle any remaining contaminants. This citrus-infused foam is specially formulated to cling to the surface for extended periods, maximizing its cleaning power. It effortlessly works its way into panel gaps and other hard-to-reach areas, breaking down grime and delivering a deep clean.
Apply Avalanche using a Foam Lance, ensuring an even coating over the entire vehicle. Allow the foam to dwell for as long as possible without letting it dry. While it works, take the opportunity to lightly agitate the foam into areas like grilles, fuel flaps, window seals, roof rails, badges, and headlights using a soft Detailing Brush or Feather Tip Brush This step ensures the cleaning solution reaches every crevice and dust trap. By this stage, large abrasive contaminants will already have been removed during the initial pre-wash, making this agitation process completely safe and highly effective.
Once the foam has done its job, rinse the vehicle thoroughly to wash away the loosened grime and residues that Avalanche has lifted and suspended. With the surface now spotless and contaminant-free, you’re ready to move on to the contact wash.
Now we come to the riskiest part of the detailing process: the contact wash. This is the stage where you physically wipe the car, making the thorough pre-wash and snow foam steps so essential to minimizing the risk of scratches or swirl marks.
The key to a safe, swirl-free contact wash lies in using the right techniques and tools. Even the buckets you use play a critical role—not only should you have two, but each serves a specific purpose. One holds your shampoo solution, while the other contains clean water for rinsing your wash mitt between passes.
Detailing buckets are designed specifically for this job. The large 20-litre capacity reduces the chances of dirt being recirculated onto your wash mitt. Additionally, these buckets include a grit guard positioned about 6cm from the bottom, trapping heavy particles beneath it to keep them away from your wash media.
When it comes to shampoo, Lather Car Shampoo is your go-to. This powerful cleaner produces plenty of suds to lift away soiling while its special lubricants help grime glide over the surface without causing scratches. Pair this with a high-quality wash mitt, designed to trap contaminants deep within its pile and away from the paintwork until you rinse it out, and you're set for a safe wash.
The process itself is just as important. Always begin with the cleanest areas to prevent transferring heavier soiling to less contaminated parts of the car. Start with the roof, bonnet, and upper sides, working your way down to the front bumper, lower sides, and rear. Use long, straight strokes rather than circular motions, as the latter are more likely to create swirl marks. By following these steps, you’ll achieve a clean, scratch-free finish.
The final step in the wash process is decontamination, or "decon," where stubborn, embedded contaminants are removed to prepare the surface for polishing. This includes metallic particles from brake dust, as well as tough residues like tree sap and tar—blemishes that washing alone cannot eliminate.
This process is completed in three simple stages, starting with Iron Out to target sharp ferrous metal particles. Specifically designed for paintwork, Iron Out is sprayed onto contaminated areas, where it reacts to dissolve and "bleed out" the metal particles. Once the reaction has occurred, the solution and contaminants are thoroughly rinsed away.
Next comes the removal of tar and sticky residues using ObliTARate, a powerful solvent-based formula also safe for use on paintwork. This product quickly dissolves and suspends residues, which can then be wiped away with a microfiber cloth. For heavier contamination, ObliTARate Gel is an excellent alternative, offering the same solvent power but with an extended dwell time to tackle more persistent grime. Both formulas are also effective for issues like traffic cone marks and overspray. After using a tar and glue remover, it’s crucial to neutralize any residual solvents by re-washing the treated areas with a pH-neutral shampoo like Lather. This ensures no interference with the next steps in the process.
The final stage of decontamination involves claying the paintwork to remove any remaining contaminants. This process uses a clay bar and a lubricant like Glide Clay Lube to gently pull out embedded residues such as sap, mineral deposits, protein from insect splatter, bird droppings, and industrial fallout. The clay glides over the surface, leaving it silky smooth and glass-like, perfectly prepared for paint correction or refinement. Claying can be performed either before or after drying the vehicle, depending on the level of contamination and personal preference. Many detailers agree that claying is where a simple wash truly transitions into a professional detail.
This stage of the detailing process becomes highly specific to your vehicle because only you can assess the paint’s condition and determine the level of correction required. Paint correction can range from minor swirl mark removal to heavy restoration using coarse compounds or even wet sanding. On the other hand, your paintwork might already be in excellent condition and only require light refinement to optimize its surface for protection. The key takeaway is that your choice of protection will essentially "lock in" the current state of your paintwork. Protection products like waxes and coatings are not designed to correct or refine imperfections—they enhance and preserve what is already there. Therefore, achieving flawless paintwork beforehand is one of the most critical and specialized steps in the detailing process. Once protection is applied, it’s too late to correct any defects underneath.
Another important factor to consider is the type of protection you plan to apply in the final stages. For the toughest winter protection, particularly on daily drivers, a ceramic coating is often the best option. That’s why this guide will use the Caramics Complete Protection Kit later in the process. The decision on protection is crucial now because it influences the choice of abrasive products used for correction.
The connection lies in the bonding process. Protection layers need to bond to the paint to form a durable shield, but waxes and ceramic coatings bond in entirely different ways.
Here’s why this matters: a wax layer prevents ceramic coatings from bonding effectively, as it blocks the SiO2 molecules from contacting the paint surface. This is why polishes and compounds used before ceramic coatings must be free of waxes or fillers. For ceramic coating preparation, we recommend products like One Step All-in-One Compound or the Revitalise System V2, which deliver a true finish without introducing wax or fillers.
If you’re opting for wax-based protection, it’s less restrictive. Waxes can bond to any clean, decontaminated paintwork—even over fully cured ceramic coatings. Waxes also bond to themselves, allowing for layering to create a thicker barrier and longer-lasting protection. For this reason, correction products containing waxes and fillers, such as Tripple All-in-One Polish, can be used for light correction, enhancement, and adding a base layer of carnauba protection. Alternatively, non-wax polishes like One Step or Revitalise Compounds can also be used prior to applying wax-based protection.
Ultimately, your choice of products and the level of correction required depends on the specific defects in your paintwork. For more guidance, you can refer to our article, All Car Polishes Explained, which details the range of polishes, compounds, and glazes available.
For this example, a single-stage refinement with Revitalise No:3 Refining Compound and a soft Revitalise No:3 Pad was sufficient to remove light defects, enhance the finish, and prepare the surface for coating with the Caramics Paint Protection Kit.
You might expect to move straight to the protection stage now, and many people do. However, with the heavier soiling that often comes with autumn and winter, it can be wise to tackle the interior before finalizing exterior protection. This precaution minimizes the risk of transferring dirt or accidentally contacting the freshly detailed exterior. Whether it’s a vacuum cord brushing the paintwork or a momentary bump against the surface, mishaps are rare but not impossible. If they happen, you’ll be glad you can easily address them before the protection stage.
Deep cleaning the interior in colder months follows the same principles as summer detailing, but with extra attention on removing heavier soiling. Stronger cleaning products may be necessary for stubborn stains, but protection is the real priority. Using the Caramics Interior Protection Kit allows you to shield high-traffic areas like carpets, mats, and seats from the grime and dirt that inevitably gets tracked in during winter. This protection also makes future maintenance easier and safer by preventing contamination from embedding in fabrics.
Before applying protection, thorough cleaning is essential to ensure surfaces are properly prepped. A deep clean involves meticulous attention to detail at every stage.
Seats and carpets often accumulate the most dirt, so begin with a thorough vacuuming to remove loose debris. Take your time to get under seats, between bolsters, and into every possible crevice. This step ensures the focus of subsequent cleaning efforts shifts to sanitizing and stain removal, rather than dealing with loose grime that could have been easily eliminated first.
The next step for cleaning seats and carpets is applying a cleaning agent specifically designed to break down and lift grime from deep within the fibers. Total Interior Cleaner is a ready-to-use product that’s perfect for regular cleaning and deep-cleaning carpets and fabric seats. For leather seats and dashboards, Hide Leather Cleanser is an excellent choice—a mild, glycerine-based formula that effectively targets ingrained dirt and oils.
Both products are simple to use: spray them liberally onto the surface and agitate with an appropriate brush. As they work, they suspend grime within the solution, allowing it to be easily wiped away with a microfiber cloth.
In most cases, these products will be sufficient to clean dirt effectively. However, for particularly stubborn stains on carpets and floor mats, a diluted solution of Verso All-Purpose Cleaner** (mixed at 1:5 to 1:2) can be used safely for occasional, heavy-duty cleaning tasks.
When it comes to cleaning interior plastics, Total Interior Cleaner is the go-to solution. It leaves a natural satin finish on dashboards, door cards, consoles, pedals, steering wheels, and other trim. Simply spritz the product onto the surface, agitate it with a Detailing Brush for extra cleaning power (especially in awkward, dusty recesses), and wipe away the residue with a clean microfiber cloth.
For hard-to-reach areas like heater vents or other tight spots, Total can be sprayed directly onto a Detailing Brush for precise application. Additionally, we recommend using Wipe Out Interior Disinfectant, which can be sprayed directly into the vents. Heater vents are prone to bacterial buildup during winter when air conditioning systems are less frequently used. Wipe Out eliminates 99.99% of bacteria and viruses, making it perfect for sanitizing vents or any high-contact areas in the interior.
The next step is to fully protect your freshly cleaned interior surfaces, giving them grime-repelling properties that are especially useful during the winter months. With our Caramics Interior Protection Kit, ceramic coating for leather, carpets, and fabrics is incredibly straightforward. As with all ceramic protection, the goal is to create a chemically bonded shield that repels water and grime. This barrier prevents dirt from becoming embedded in surfaces and makes future contamination easier to clean since it will simply sit on top of the cured SiO2 Caramics coating.
For fabrics and carpets, the key is ensuring the Fabric Coating reaches and treats every fiber. This is why it’s developed as a spray, allowing you to evenly mist it over surfaces. Once applied, simply leave it to cure—no additional steps are needed.
Leather surfaces, on the other hand, require more targeted application. Spray the Leather Coating onto the provided micro applicators and gently wipe it over the surface to apply the coating. Once cured, this will create a durable ceramic layer that not only resists spills and dirt but actively repels them, keeping your interior looking pristine.
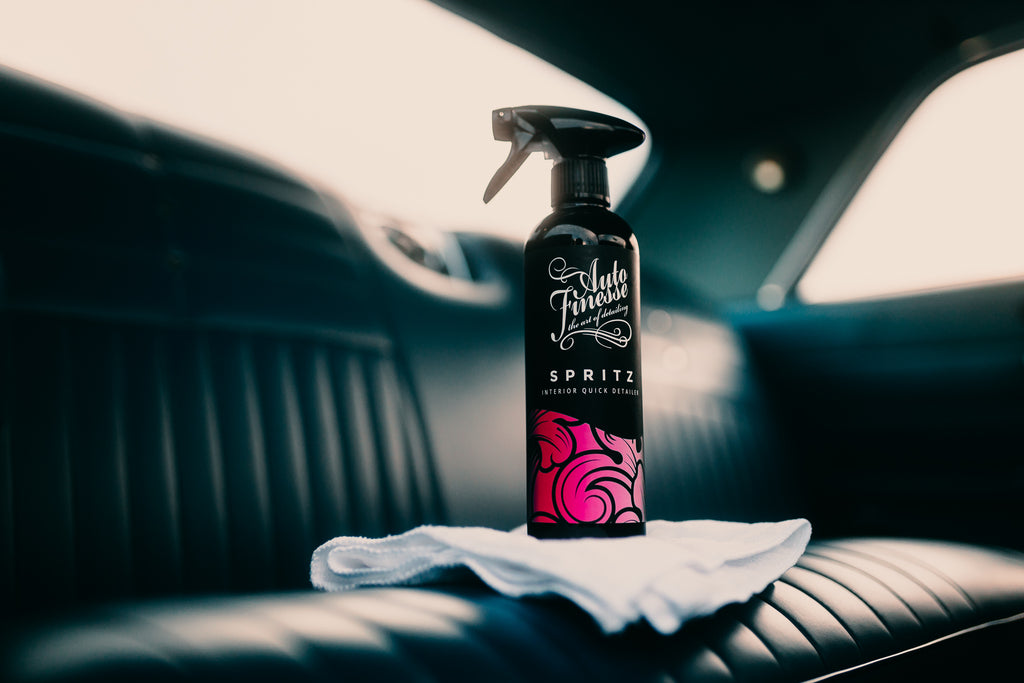
Spritz Interior Detailer is another highly effective product for interior care. While its primary purpose is to clean light dust and interior films from plastics, rubber, and vinyl surfaces—making it ideal for regular maintenance—it also offers additional benefits. Spritz contains UV inhibitors that help protect your trim from fading and anti-static agents designed to repel dust, keeping your interior looking cleaner for longer.
With the interior complete, now’s the perfect time to protect the exterior, starting with the paintwork. So, why do we recommend ceramic coatings, specifically our Caramics Paintwork Protection Kit, over traditional wax during winter? The reason isn’t aesthetics (we still love the warm glow of wax), but durability and protection. While wax works well in winter, ceramic coatings are better for vehicles exposed to harsh weather.
Ceramic coatings chemically bond to paintwork, forming a hard, resilient layer that resists chemicals and can only be removed by abrasion. This makes them ideal for daily drivers or cars left outdoors. For occasional-use show cars, wax may still be a great choice, but for most vehicles, ceramic coatings are more practical.
Made from silica (SiO₂), the same material as glass, ceramic coatings create a super-smooth surface that repels grime and water. Dirt slides off easily, while water beads and rolls away, giving the paintwork enhanced hydrophobic properties.
For more details on how ceramic coatings work, check out our article: What Difference Does a Ceramic Coating Actually Make?
What about the application? That’s where our Caramics range truly stands out. Unlike traditional ceramic coatings that require professional training for safe application, Caramics is designed to be user-friendly.
The durable ceramic polymer coating in our Paintwork Protection Kit provides up to 12 months of protection and is applied using specially impregnated Ceramic Resin Wipes. Simply glide the wipes across the surface in a crosshatch pattern (up and down, then side to side) to ensure even coverage. The coating cures quickly, so after just 2–5 minutes, you can buff away the residue with a fresh microfiber cloth, leaving your paintwork fully protected.
Before applying the coating, don’t forget to use the Prep Spray included in the kit. This powerful solvent removes polish dust, fingerprints, and residues that could interfere with the ceramic bonding process. Just spray it on the panel, wipe it down, and you’re ready to begin.
Our Caramics Glass Protection Kit offers the same simple application process and delivers up to 12 months of ultra-hydrophobic protection, ensuring exceptional water beading on glass. It’s an easy choice for improved safety and clearer vision during the winter months.
As with paintwork, surface preparation is key. That’s why the kit includes a specially formulated polish to clean the glass on a microscopic level, removing any contaminants. Once the surface is prepped, the application is straightforward: use a Glass Wipe on each window, then buff off any excess with a quick spritz of the included Residue Remover.
Every step has been designed with ease of use in mind, making it as simple as possible to protect your glass.
The final step in Caramics protection is for your wheels. While this product can be quickly applied to protect the faces and lips with the wheels still on the vehicle, for full winter protection, we’ll also coat the insides.
With the Wheel Protection Kit, proper surface preparation is crucial. Start by working on the inside of the wheels before moving to the outer faces and lips.
Begin by applying the included Prep Spray to all areas, ensuring every part is spotless. Use a microfiber cloth to buff into the recesses and remove any lingering contaminants.
The Wheel Coating is applied as a spray, allowing the polymer resin to reach all surfaces. Spritz it on, then use the special micro applicator to spread the coating evenly, working it into every small nook and cranny. Once applied, buff off the excess residue.
That’s all it takes for up to 12 months of ceramic protection—quick, simple, and effective.
Naturally, every detail comes with a few finishing touches tailored to the car you're working on. Whether it’s applying a bit of Mercury Metal Polish to your exhaust tips or brightwork, or using Revive Trim Dressing to rejuvenate faded plastic trim, the final touches are all about your preferences—and, let’s face it, they’re half the fun of detailing!
There are, however, a few finishing touches that are especially suited for winter preparation, and the first is perhaps the most obvious—tyre dressing.
Applying Satin Tyre Crème provides more than just a subtle, refined finish; it creates a durable barrier that resists harsh elements and can be easily refreshed with each wash. In essence, Satin not only nourishes and reconditions your tyres from within but also protects the exterior from accumulating grime.
Glisten Spray Wax is an incredibly handy product for protecting those hard-to-reach areas that other products might miss, such as inside panel gaps. Just a light spritz is all it takes—a little goes a long way—and you’re done!
This solvent-based liquid wax is effortless to use, offering up to a month of protection. It’s also ideal for quickly protecting other tricky spots like door jambs and boot or bonnet shuts. Alternatively, if these high-contact areas need a bit more attention, Tripple All-in-One Polish is the perfect solution. It cleans, polishes, and protects—all in a single application.
Finally, there’s Revive Trim Dressing—a silicone-based product primarily designed to rejuvenate and create a water-resistant protective barrier on matte plastic trim. However, it’s also perfect for a quick wipe over your rubber seals.
This isn’t just about aesthetics; the silicone polymers help prevent seals from sticking to your paintwork (and potentially tearing) when temperatures dip below freezing. After all, no one enjoys dealing with sticky doors in the middle of winter, right?
At this point, you can step back and admire the results of your deep-cleaned, fully protected vehicle. While it’s now prepped and ready for winter, there’s one final step to wrap up this comprehensive guide—and it’s all about ongoing maintenance.
Proper upkeep is essential and shouldn’t be overlooked—knowing how to safely wash a car is a fundamental part of detailing. Skipping the correct process can undo all your hard work, wasting your time and effort. In short, improperly cleaning a soiled vehicle, no matter how well-protected, will likely cause swirl marks, inflict damage, and degrade protective layers. This is especially true when tackling the serious contamination winter can bring.
Fortunately, you’ve already mastered the safe wash process, so maintenance follows much the same principles. The goal is to remove contaminants without causing damage or compromising protective layers while using the right products to reinforce your ceramic protection.
The good news? This time, achieving great results will be much faster and easier—even when dealing with a vehicle coated in the toughest winter grime.
The key here is to stick closely to the proper process—wheels, pre-wash, and a two-bucket contact wash—while selecting the right products for the safest and most effective clean.
Starting with your wheels, if you’ve already cleaned, fully decontaminated, and ceramic-coated your rims during winter prep, there’s no need for aggressive products this time around. In most cases, a touch of Citrus Power—or Imperial Wheel Cleaner for heavier soiling—will easily tackle grime and brake dust without compromising your ceramic protection.
The pre-wash step is crucial to safe and effective cleaning. Start by thoroughly rinsing your vehicle; you’ll notice that most grit and heavy grime will wash away easily—this is your Caramics protection in action, preventing contaminants from adhering to your paintwork.
Next, apply Citrus Power or Dynamite to any dirtier areas. Both are specially formulated to clean without degrading your protective layers. Simply spray on your Citrus Power solution (or an appropriate dilution of Dynamite), let it dwell for a few minutes, and rinse away the grime suspended in the solution. Don’t forget to pay attention to door jambs—these areas are notorious for collecting grime as you get in and out of the car.
Next up is Avalanche Snow Foam, designed to penetrate recesses and panel gaps effectively. Allow the foam to dwell on the vehicle for as long as possible, then rinse thoroughly, making sure to flush out all the gaps and hard-to-reach areas. This step not only eliminates any contaminants still clinging to your paintwork but also prevents grime hidden in panel gaps from resurfacing later.
Finally, it’s time for the two-bucket wash, but with one key difference: using Caramics Enhancing Shampoo. While Lather Car Shampoo is highly effective as a cleaning agent, Caramics Shampoo is specially formulated to reinforce ceramic coatings. It serves as a convenient top-up product, providing added protection while you clean.
There are several ways to maintain protection during the winter, but one of the simplest is using a foam lance with Lavish Ceramic Foam after your contact wash. Lavish not only provides an SiO₂ coating with up to six months of durability on its own, but when applied to a vehicle already protected with Caramics, it delivers a double layer of hydrophobic magic. It’s no wonder this is one of our most popular products!
Once Lavish has been applied to the entire exterior—including wheels and glass—rinse it off immediately. Then, dry your vehicle with a Silk Drying Towel, designed specifically to avoid abrading protection layers. In no time, your car will be clean, protected, and ready for finishing—quick and effortless!
With Caramics, maintaining your vehicle is a breeze. Since all the hard work was done during the preparation stages, there’s no need to reapply any of the Caramics System coatings. However, you can take your paintwork protection to the next level by boosting it with Caramics Gloss Enhancer.
This next-generation product is the ultimate quick detailer for ceramic-coated paintwork. It effortlessly removes stray watermarks and fingerprints while adding a slicker, glossier finish to enhance your vehicle’s look.
Caramics Glass Cleaner is another excellent companion product in our Caramics coatings range. Not only is it an exceptionally effective glass cleaner, but like Gloss Enhancer, it actively reinforces your glass coating, enhancing hydrophobic water behavior. It’s an essential for all exterior glass—especially during the winter months.
A fully protected interior with Caramics is a game-changer, especially during winter. Most grime—even the tough stuff—can be quickly and easily vacuumed away. Just like ceramic coating your wheels or paintwork, it prevents contaminants from sticking and becoming ingrained, making it a breeze to clean high-contact areas like fabrics and cloth seats. Typically, a quick spray and wipe with Total Interior Cleaner is all you’ll need to freshen things up—perfect for those cold days when no one wants to spend extra time cleaning.
To make things easier, regular interior maintenance is key, especially for light to moderate soiling. A simple "once-over" every so often during winter will help keep everything in top shape. You don’t have to wait until your next full maintenance detail—staying on top of grime and dust build-up as you go is far more efficient.
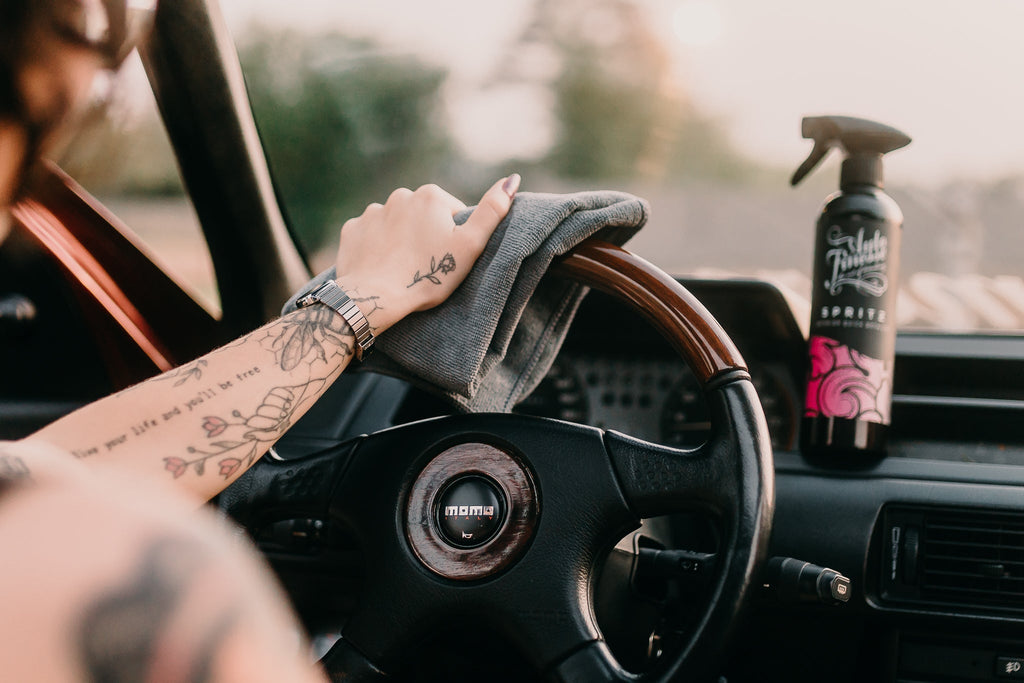
One of the best tools for the job is Spritz. Spray it onto hard surfaces (or directly onto a cloth) to effortlessly remove dust, light dirt, films, and fingerprints. Plus, Spritz provides durable UV protection to guard against fading and cracking, along with advanced anti-static properties to repel dust and keep your interior looking cleaner for longer.
And that's it! With just a bit more Glisten for those hard-to-reach spots and a touch-up of Satin to shield your tires from the elements, you're all set—inside and out. In under an hour, you've achieved thorough maintenance and added protection.
By incorporating a few of these quick maintenance washes over the next few months, you and your pride and joy can cruise through winter effortlessly and in style.
