


How To Get The Best Results With One Step Compound
How to Get the Best Results with One-Step
 Skip to content
Germany

How to effectively remove those pesky swirl marks is one of the most common questions in car detailing. However, it’s important to approach it with two key considerations. First, the answer is simple: swirls can only be removed by polishing your paintwork. But second, we must ask—why do you have swirls in the first place? Understanding both aspects is essential to achieving the best results.
The good news is, no matter how severe the swirls may seem, they usually appear worse than they really are. Correcting swirls with the best detailing products is not only safe and straightforward, but it also enhances your paintwork’s appearance, helps maintain your vehicle's value and makes your car easier to wash the next time around.
With that in mind, here’s everything you need to know about eliminating those swirl marks and the best polishes and compounds to use along the way...
Polishing and paint correction is often seen as the stage where your car wash becomes a fully-fledged detail. But, whether you’re restoring and refining your paintwork with a machi...
Swirl marks are one of the most common paint imperfections, consisting of fine scratches on the top layer of your paintwork. These scratches often create a random pattern, resembling a spiderweb, and can be especially noticeable on darker-colored cars, although they're equally common on lighter vehicles. The way light interacts with these scratches causes them to stand out, amplifying their visibility—making what are usually minor imperfections look like significant damage, particularly in direct sunlight. And as we know, first impressions matter!
While these tiny scratches are visually unappealing in all lighting conditions, they also create a rougher surface that makes it easier for dirt, water, and other contaminants to stick. This leads to quicker contamination of your paint, requiring more frequent washing and decontamination with specialist detailing products.
Swirl marks are generally confined to the top layer of the paint, usually around 2-4 microns deep. In some cases, deeper swirls may form, but as long as the damage hasn’t penetrated the basecoat beneath the top layer, these marks can be safely removed by machine polishing.
In single-stage paint (often found on pre-1980s cars, with just a colored basecoat over primer), swirls are confined to the color coat. In more common two-stage paint (where a clearcoat layer sits above the basecoat and primer), swirls are typically limited to the clearcoat. These are the layers you will be polishing to restore a smooth, flawless finish.
Light scratches and swirl marks are mainly caused by improper washing techniques, with automated car washes being one of the biggest culprits. These washes use large brushes that often retain grit and grime from cleaning multiple vehicles, essentially rubbing these contaminants into your paintwork. Since most people use automated car washes when their vehicle is already very dirty, the wash media will likely pick up heavy soiling, and even the smallest piece of grit can leave behind swirls on your paint.
Hand washing, if not done with care, can also damage the paint. Dragging contaminants across the surface with a wash mitt or sponge is a surefire way to create swirls. Using a single bucket of water without a separate rinse bucket to clean your mitt after each pass can also contribute to the problem. Even washing in small circular motions can lead to swirling, which is why proper washing techniques are essential.
Prevention is key: it's not just about polishing away swirls—it's about avoiding them in the first place. Without mastering the wash stages, especially during regular maintenance washes, any effort to polish out swirls will be short-lived. Without a proper wash routine, you can count on those swirls making a return after just a few washes!
We’ve always said it; the contact wash stage (or the ‘wet work’) is likely the most important part of car detailing process. This is because it not only lays the foundation for ev...
So, what's the ideal way to safely wash your paintwork? It’s all about combining the right techniques with the right car wash products. The ultimate goal is to avoid swirl marks altogether, so you never have to polish in the first place. Here's a basic step-by-step guide to getting a safe car wash...
First and foremost, always start on your paintwork with a thorough pre-wash. This step is performed straight after cleaning your wheels and tyres and designed to help remove the heaviest soiling before your wash mitt even touches the car. The idea is to significantly reduce the risk of swirls later when you contact wash.
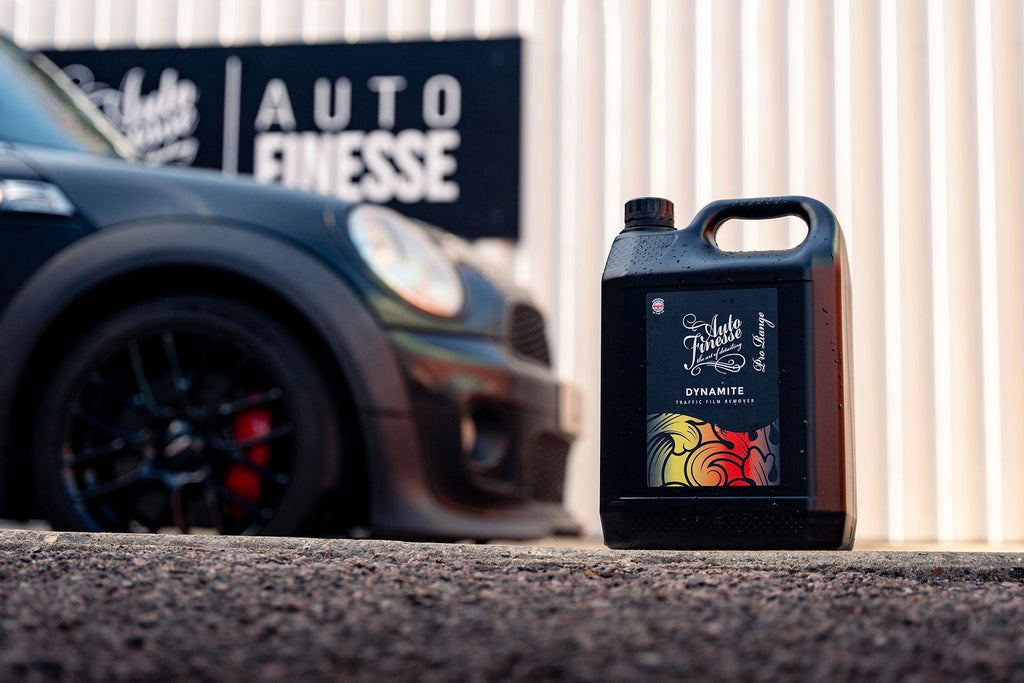
Begin by rinsing away as much dirt and grime as possible using a pressure washer (physical contaminant removal). Next, apply a suitable pre-wash cleaner, such as Citrus Power Bug & Grime Remover or Dynamite Traffic Film Remover, to break down and lift stubborn debris and dirt (chemical contaminant removal). Our pre-wash cleaners are specifically designed to dissolve and suspend harmful particles, allowing them to be rinsed away safely without making contact with the paintwork.
The second stage is using snow foam and, although still technically part of the pre-wash, is equally essential for a swirl-free wash. Avalanche Snow Foam, infused with citrus, works similarly to our pre-wash cleaners. However, due to its thick foam consistency, it clings to the surface longer, allowing maximum dwell time to break down even the most stubborn dirt. Avalanche also reaches into all the nooks and panel gaps, flushing out hidden dust and grime that could later be blown out. This feature is invaluable.
Simply apply it to the entire car using your Snow Foam Lance or Foaming Pressure Sprayer, let it dwell so Avalanche can do its job, and then rinse thoroughly. It’s that easy!
Safe washing doesn't end with the pre-wash, and now it's time to move on to the contact wash. This stage is crucial, as it's when your paintwork is most vulnerable, but there are steps you can take to minimize the risk of inflicting swirls.
First and foremost, use Lather Car Shampoo. This product is specifically formulated to be a powerful cleaner, lifting any remaining grime, while also acting as a lubricant. The lubricating properties create a slippery barrier between contaminants and your paintwork, ensuring they don't come into direct contact as the suds are rinsed away.
Lather Car Shampoo is a powerful blend of advanced surfactants and highly-concentrated lubricants, designed to make your contact wash easier - and safer - than... See product details More
Using two Detailing Buckets is essential every time you wash your car. One should be filled with your car shampoo solution, and the other with fresh, clean water to rinse your wash media after each pass, removing any dirt it has picked up. This technique is crucial to minimize the risk of dragging contaminants across the paint. And don't forget the third bucket—this one is dedicated to cleaning your wheels and tyres before you even begin the pre-wash on your paintwork!
A professional wash mitt or wash pad is an essential tool for a swirl-free wash. We've developed a range of pro wash media but whether they're made of lambswool or microfibre they all share one important trait. All our mitts and pads are gentle on surfaces and designed to lift dirt and debris, trapping them deep within their fibres until they're rinsed out in your bucket. Unlike traditional sponges, which push grime around and often scratch the paint, these types of wash media are a much safer and more effective option.
A quick tip for maintaining your mitts—and all car detailing cloths—if you drop them, throw them away. It's a common mistake to pick up a cloth or mitt after it hits the floor, but once it collects debris from the ground, it's nearly impossible to guarantee you'll be able to clean it fully. It's just not worth the risk of causing damage to your paint.
To reduce swirl marks, it's important to wash in straight, sweeping lines rather than circular motions. Equally crucial is the order in which you tackle the vehicle. Start with the cleanest areas to prevent transferring grime from dirtier sections to cleaner ones. Begin with the roof, followed by the windscreen, bonnet, upper sides, front bumper, rear end, and lower sides. However, always use your judgment and adjust based on the condition of the vehicle.
Once you have washed and rinsed that's the safe wash process complete. Normally, say if we are performing safe routine maintenance, we can now dry the car with a suitable drying towel. That's the basics of a safe wash routine, but for a more in depth article on the science behind the products and the process see our guide: How To Wash Your Car Safely.
Because we're looking to eradicate swirl marks here, we won't dry just yet, instead we'll be performing a full 3-stage paintwork decontamination.
After completing your contact wash, you can either rinse and dry or proceed with a 3-stage decontamination process before addressing swirl marks. This "decon wash" technique is designed to remove deeply embedded contaminants using specialist decontamination products.
Begin with Iron Out Fallout Remover to eliminate ferrous metal deposits, follow with ObliTARate Tar & Glue Remover for sticky residues, and finish with a Clay Bar paired with Glide Clay Lube to physically extract stubborn particles like tree sap, bird dropping residue or overspray.
This process is crucial to ensure contaminants are removed completely, preventing them from causing further damage during polishing. For a comprehensive guide, check out our full article: Safely Decontaminating Paintwork.
Now that you’ve mastered washing, it’s time to tackle those swirl marks.
Swirls can only be removed through surface abrasion using a suitable car polish or polishing compound. These abrasive detailing products work by removing a microscopic layer of the surface, leveling it out to create a smooth finish. Technically, you’re not removing the swirl marks themselves but polishing down the surrounding paintwork to the depth of the deepest swirl. This also makes light reflect from the surface in a more uniform fashion, making the paintwork appear deeper and glossier. Although soime polishes can be worked through fully by hand, in most cases we'll use a polishing machine to break down the compounds and get the most consistent results.
This method highlights the importance of having enough paint to polish. Professional detailers often use paint depth gauges to confirm there’s sufficient material to work with, avoiding the risk of burning through to the layer below—whether it’s the primer on single-stage paintwork or the color coat on two-stage systems.
As a guideline, clearcoat layers are typically about 70 microns thick, while single-stage basecoat layers are around 40-50 microns before any polishing. Even though polishing removes just a few microns at a time, repeated corrections will thin the paint to the point where polishing becomes risky. That’s why paint correction should be treated as an occasional task, performed no more than a couple of times a year. Polishing after every wash would quickly wear down your paint, leaving it vulnerable. Proper maintenance isn’t just beneficial—it’s essential to preserving your paintwork.
Machine polishing is for many the process where a traditional car wash becomes more of a professional style detail. This is also the detailing stage most associated with profession...
Several variables can influence the choice of polishing products you’ll need, with the severity of the swirls being one of the most critical factors. Deeper defects require more "cut," meaning a coarser compound or polish to remove more of the surface layer and level it out. Essentially, compounds and polishes serve the same purpose, but their level of "cut" depends on the size of their abrasive particles. Larger particles remove material more aggressively, akin to the difference between coarse and fine sandpaper, but on a microscopic scale.
It’s common to loosely refer to a coarser product as a "compound" and a finer one as a "polish," though both are fundamentally similar. The key factor to consider is their level of abrasiveness. A coarse compound cuts quickly but often requires follow-up stages with progressively finer products to refine the finish. This process is comparable to smoothing wood—whether you’re finishing it with fine sandpaper or an angle grinder makes a world of difference. While extremely coarse compounds are typically reserved for heavy restoration work, even moderate swirl marks can often be addressed with medium-to-fine products.
Polishing and paint correction is, for many observers, the process where a car wash becomes a detail. There’s no doubt that this stage is the one that’s most associated with the ar...
It’s equally important to think about the type of protection you’ll apply after removing those swirls. Safeguarding your hard work with a protective layer is non-negotiable—it’s an essential step in the process. However, the type of protection you choose can influence your choice of compound. For instance, if you’re planning to use a ceramic coating, you’ll need a compound that's free from waxes or fillers, as these can interfere with the coating’s chemical bonding process.
On the other hand, if you’re opting for wax-based protection, a car polish that already includes wax is perfectly fine—it simply adds an extra layer of defense. Alternatively, you can stick with a correction product that doesn’t contain any wax and follow up with your chosen wax protection afterward.
Car Wax, Ceramic coatings, and spray wax. Adding protection, especially after any polishing and correction has taken place, is not only one of the key fundamentals of car detailin...
Hand polishing can be effective, especially for small areas and when using fine abrasives, making it possible to eliminate light swirling manually. However, due to how polishing compounds work, a machine polisher is typically the fastest option and one that delivers the most consistent results.
Polishing compounds rely on heat and friction to break down their abrasive particles. On a microscopic scale, these particles fragment into smaller pieces as they are worked into the paint. This process reduces their cutting ability and shifts toward creating a more polished, refined finish—what’s known as the compound’s "range of cut."
It’s crucial to fully work the compound until it’s completely broken down, often indicated by the residue turning clear, to achieve the most polished surface possible. A machine polisher speeds up this process, ensures consistency, and helps deliver professional-level results more effectively than hand polishing.
Polishing and paint correction is often seen as the stage where your car wash becomes a fully-fledged detail. But, whether you’re restoring and refining your paintwork with a machi...
In addition to our DPX Dual Action Machine Polisher and MPX Dual Action Polisher, along with a wide selection of polishing pads and polishing accessories, we offer a complete range of compounds and polishes. Here’s how to select the right one for your needs...
Tripple All-in-One Polish is highly effective for tackling light swirls, thanks to its fine abrasives that break down easily to deliver a highly refined finish. This versatile product is perfect for light enhancement and swirl removal. What sets Tripple apart is its inclusion of carnauba wax, allowing it to clean, polish, and protect in a single application—hence the name.
See more of the uses of Tripple in our article: Take Your Detailing To The Next Level With Tripple.
Discover the ultimate car polish with Tripple All-In-One Car Polish, designed to deliver outstanding results in record time. This advanced polishing compound is... See product details More
One Step Compound is single-stage car polish and a revolutionary next-generation compound that stands apart from traditional polishes due to its exceptional range of cut. Unlike standard compounds with a limited range, One Step begins as a coarse-to-medium compound capable of addressing heavy swirling and defects and gradually refines to a fine polish as it's worked through. This versatility eliminates the need to switch products for surface refinement. Free from waxes and fillers, One Step delivers a true finish, making it ideal for applying a car wax or preparing the surface for a ceramic coating. See more in our article: How To Get The Best From One Step.
The ultimate single-stage car polish for paint correction, One Step All-in-One Compound is a speedy car detailing game-changer that offers the easy way to remo... See product details More
Rejuvenate Pre-Wax Paintwork Cleanser is specifically formulated to eliminate paint oxidation and enhance the appearance of hard waxes. Packed with fine abrasives, it effectively addresses light swirl marks while preparing the surface for waxing. Suitable for application by hand or machine polisher, Rejuvenate is free from waxes and fillers, ensuring a true, clean finish that's optimal to bond with your wax protection layer.
Specifically developed to enhance both the beauty and performance of our Signature Waxes, Rejuvenate is an advanced abrasive pre-wax cleaner cleanser polish, t... See product details More
The colour-coded Revitalise System V2 is a collection of advanced machine polishing compounds and pads to cover every level of paint correction from restoration to final refinement.
Designed for professional results at home, our three stages of compounds range from coarse cut Revitalise No:1 Restoring Compound and medium Revitalise No:2 Polishing Compound to fine Revitalise No:3 Refining Compound.
Our Pro Series Compounds and Machine Polishing Pads are the result of years of development and testing with independent professional detailers. Our range includes our No.36 Heavy Cutting Compound, No.23 Medium Polishing Compound and our No.15 Fine Finishing Compound, along with Heavy, Medium and Fine Pro Series Machine Polishing Pads. See more on these in our article: The Auto Finesse Professional Series Range.
The final consideration is the actual process. While it's essential to always follow the instructions on your chosen products, we can provide a general guide. After washing, decontaminating, drying your vehicle, and masking any areas at risk, you're ready to begin...
First, always test a small area with your product before applying it to the entire car. We recommend starting with the finest compound available to see if it provides enough cut, and then adjusting as necessary. Keep in mind that there’s no need to start with the coarsest compound if it’s not required. Using a harsh compound unnecessarily will only waste time and product, as you’ll need to refine the paintwork to a flawless finish afterwards.
In most cases, light swirling can be removed, and the paint can be refined using just a single product. As mentioned, most swirl marks are actually relatively fine defects to begin with.
Once you’ve chosen your product, it’s time to get started—but don’t make the mistake of trying to tackle the entire vehicle in one go. To effectively work through any compound focus on an area about nine times the size of your pad. Move slowly, around an inch per second, to ensure thorough coverage.
It's also important not to overuse the product—two or three pea-sized drops on a 5-inch pad is plenty. For smaller pads, use less product.
As a general rule, begin by running the machine at a low speed to spread the product across the area. Then, increase the speed and make several passes to fully work the compound. Once the residue turns clear, finish with one slow pass at a low speed to refine the paint further.
Learn more about how compounds and polishes work in our article: Understanding Car Polishes And Compounds.
Next, remove the residue using a clean Microfibre Work Cloth. For the best results, it's always a good idea to invest in fresh Work Cloths to ensure you don’t accidentally introduce any new swirls. Remember, taking care of your microfiber towels is a key part of proper detailing!
A dedicated detailing lamp is an essential tool, not only for inspecting your work but also for identifying imperfections before you start. It’s important never to polish in direct sunlight. Our Swirl Spotter Detailing Lights are designed to mimic intense sunlight, making it easy to spot any flaws. Always use a light to check the surface before you begin polishing, and again afterward. Once you’re satisfied that no further cutting or refinement is needed, move on to the next area before adding your chosen protection.
That's everything you need to know about cutting through swirl marks, refining your paintwork and maintaining the finish during routine maintenance. For more information on removing other defects, and the science behind different paint types and different polishers check out our article: A Basic Guide to Machine Polishing.
And for more top how-tos have a little look at the Guides Section Of Our Blog.
